I bake often enough that a 1kg bag of flour creates too many trips to the supermarket. Oddly, though, it is very hard to find anything larger in the shops here. Even the hippy-dippy coop’s 5kg bags are not straight flour but things like pizza mix with built-in yeast. So I buy flour online in bulk, usually 20kg at a time; 10 strong, 5 weaker and 5 wholemeal. And although things tend to balance out, sometimes I’m stuck with a surfeit of one or the other. At the moment, it’s the weaker white flour, so I was looking through some recipes in search of inspiration. I decided to try linseed bread from Dan Lepard’s The Handmade Loaf.

Last night – without knowing precisely what I planned to bake – I built my 100% starter, so this morning I had 160gm of nice, ripe, bubbly leaven to begin with. I did the conversions from Dan Lepard’s yeasted recipe, measured the stuff, and started to mix. But while Dan forecasts a “soft and sticky dough,” and suggests you “scrape any dough from your fingers back into the bowl,” I ended up with a very dry dough indeed. It held together, but only barely.

I tried to get a bit more water into the dough, but that is really difficult with a stiff dough. Pretty sure that I had done the conversion right, I weighed the dough. And lo! It weighed 600gm instead of the 500gm that totting up Dan’s ingredients indicated. But how? I thought back, and still can’t work it out. I couldn’t possibly have put 100 gm too much flour in. Could I? And 200 gm of linseeds instead of 100? Maybe.

Off I went for my morning constitutional, during which I decided to turn this disaster into another experiment in my cracker series. So after about three hours of rising, I rolled the dough out as thin as I could get it, using a bit of rice flour – aka baker’s Teflon – to keep things from sticking. It was down to maybe 2–3 mm, which I cut into neat shapes. Now, the tricky bit; how long, and how hot?

I put the oven on max, which is just north of 220°C, and rolled out the scraps that resulted from tidying up the edges of the crackers. That gave me four test crackers. They got 10 minutes before I took a look. They were still quite pale, and soft. I flipped them over, and gave them another 10 minutes. Maybe a little too well done. So for the first tray of crackers proper, which were definitely a bit thinner than the tests, I reduced the time to 8 minutes per side. Not bad at all. And the second batch got even less, 7 minutes a side.

Done

They were so good. Crunchy, but not tooth-breakingly so, with the nuttiness of the flax seeds and just a hint of bitterness. Magic, really.

Now all I have to work out is where I went wrong in the first place, so I can do it again.

There are so many great crispbreads in Sweden, from the very traditional round ones, still with a hole in the middle so you can thread them on a pole for winter storage, to utterly modern things studded with chia seeds. I love them all, but most of the crackery things available commercially in Rome just aren’t as good. Nor do they need to be, with great pizza bianca around the corner. So, time to make my own.

It’s been 2 1/2 years since I last tried, and that was a qualified success. So I decided to use the same recipe as before – Dark Crisp Rye Bread from Dan Lepard’s The Handmade Loaf – and adjust the cooking time down. This time I am going to give the recipe here, as I think merely discovering the correct cooking time represents an improvement.

Ingredients

100 gm rye leaven (50% hydration)
200 gm warm water
200 gm wholemeal rye flour
4gm fine salt

Method

First build the leaven. I use about 20 gm of my ordinary 100% hydration sourdough starter, mixed with 40 gm of water and 80 gm of rye flour to give a final leaven at slightly more than 50% hydration. In a small bowl mix the starter with the water first, then stir in the rye flour until you have a stiff paste. Pack that down into the bowl, cover with a plate and leave for 8–12 hours. It will puff up quite a bit.

For the dough, I used all the leaven, but you can be a stickler and weigh out 100 gm. I omit the small amount of yeast that Dan Lepard uses. Put the leaven into a large bowl, add the water and salt and break up the leaven a bit with a wooden spoon. Add the rye flour and stir until it is all incorporated and you have a somewhat sticky paste. Push it down into the bowl and smooth the top as best as you can, just to reduce the surface area so it down’t dry out too much. Cover with a damp cloth and leave in a warm place for about 3 hours.

Prepare two pieces of baking parchment, the size of your baking tray. Scrape half of the dough paste onto the centre of one of the pieces. Dust heavily with rye flour and roll out to around 0.5 cm thick. Dust with more flour if it shows the slightest sign of sticking to the rolling pin. Repeat with the other half of the dough. Cover the dough on the parchment with a dry cloth and leave in a warm place for about 2 hours. Again, the dough will puff up a little.

Preheat the oven to 220°C. Using the tip of a wet knife (to stop sticking) cut the rolled-out dough into shapes that please you. Using the end of a wooden spoon handle, poke the surface all over to create dimples. Slide the parchment directly onto your baking stone (if you have one) or onto a baking tray and bake for about 25 minutes, checking to see that they aren’t burning.

At that point I took the crackers from the oven, allowed them to cool for a minute or two, then broke them up and left them on a wire rack to cool. They were very good, at least on the first night, but by the next day I confess that things were not as I had hoped. The thicker crackers, especially, had become almost impossibly hard and tooth-threatening. I think the problem is that the inside was still somewhat moist, and some process as yet unknown to me had overnight rendered the entire cracker almost unchewable. Once chewed, they were still delicious, but not for the weak.

May I be excused a bit of doggerel?

“You are old,” said the youth, “and your jaws are too weak
For anything tougher than suet;
Yet you finished the goose, with the bones and the beak –
Pray how did you manage to do it?”

“In my youth,” said his father, “I took to the law,
And argued each case with my wife;
And the muscular strength, which it gave to my jaw,
Has lasted the rest of my life.”

Anyway, I put the crackers in a very low oven for half an hour and then left them there with the door open for another couple of hours, and that seems to have dried them out to the point where they are crisp but not hard. Does that make sense?

I’m determined to keep trying. We had so many great, different crackers in Sweden, many with whole seeds pressed into the surface, that I want to recreate here. And I’m wondering, would a pasta machine be able to handle such a dough, to get the really thin crackers? I plan to find out.

Quite apart from wanting to do something different, I’ve also got a surplus of slightly weaker flour which needs using up. Something without too much freight to support was called for. Something with a bit of a different flavour and texture. And then I remembered an unopened packet of kalonji seeds. I do like kalonji in bread. So how about a slightly different riff on that, kalonji and giant, golden raisins?

Ingredients

290 gm ripe starter at 100% hydration
755 gm ordinary flour
100 gm wholewheat flour
535 gm water (taking final hydration to 68%)
20 gm kalonji seeds
50 gm sultanas
15 gm salt

Method

Break up the starter in the water and add 350 gm flour. Mix well and allow to stand for 5 or 10 minutes. This period of rest, called autolysis, helps to build gluten. Add the rest of the flour, the kalonji, sultanas and salt. Mix well and then tip out on the counter so you can bring it all together. It will be quite soft and sticky. Do a couple of stretch and folds, form into a ball and return to the bowl. Cover and leave for 45 minutes.

After 45 minutes, tip out of the bowl and do a couple of sets of stretch and folds. It should have noticeably more structure. Return to the bowl for a further 45 minutes of bulk fermentation. Stretch and fold again and then leave for a further 90 minutes.

Divide the dough into three portions of about 600 gm each. Shape into loaves and rest in a well-floured couche for about 90 minutes.


Preheat the oven to 230°C and prepare to use steam.

Gently place the loaves on your tray or peel, slash and spray, and bake with steam for 15 minutes.

After 15 minutes remove the source of steam, turn the oven down to 215-220°C and bake for another 20 minutes, until the loaves are well coloured.

The bread is slightly dense, and chewy without being too crusty. It is very good with cheese, and a light toasting brings out the aroma of the kalonji.

I think I’ll send this to Yeastspotting.

When I was growing up I was fortunate enough to have a mother who really cared about “healthy” food. She wasn’t quite what one might today call a health-nut, but the bookshelves featured Adelle Davis and John Yudkin, and her baking featured plenty of wholemeal flour. The bread, in particular, was a leaden brown brick, far better toasted than fresh, tasty and filling and quite a lot of work to chew. I remember too a batch of homemade blackberry jam, made with brown sugar, probably Muscovado rather than Demerara, which was always under suspicion of being white dyed a bit brown. That jam set so solid it needed brute force to prise it from the jar. It had to be sliced, rather than spread, but sliced onto that bread, made the chewing worthwhile.

The other thing about the bread was that it was easy as pie; just roughly mix flour, water and yeast with some salt and sugar, pour the resulting goop into greased tins and by the time the oven was hot it had risen a bit and was ready to be baked. This was the famous Grant loaf, perfected and made famous by Doris Grant, another pioneering health-food nut, who as it happened lived to be 98. The Grant loaf was pretty popular, and I’d be lying if I said I didn’t enjoy it. I even made it myself a few times, back then, but I also think it was those loaves that started me baking my own bread, for no other reason than to have something else under my peanut butter and sliced jam.

The Smithsonian article set me thinking. First, was the Grant loaf as simple as I remembered it? Yes; although one of the recipes I found suggested sieving out the bran. Huh? The same recipe said to make it half and half with white flour. Huh? squared. But then, all Hamelman’s recipes for wholemeal breads seemed to call for half and half. Elizabeth David had a few versions of Doris Grant’s own recipe, and so did Saint Delia, and all of them seemed to ask a lot of yeast to do its work in a little time.

I can do better than that, I thought, making use of what I’ve learned in the past few years. So I had a go, using a natural leaven not commercial yeast. And it worked. Beyond my craziest expectations.

Ingredients

350 gm ripe wholemeal leaven at 75% hydration
800 gm strong wholemeal flour
700 gm water
17 gm salt

Method

Prepare your leaven by feeding your starter with 200 gm of wholemeal flour and 150 gm of water. As it happens I keep two starters going, one a 75% wholemeal starter, the other a 100% white starter, and I used the brown, but I don’t think it matters much what your starter is. Allow to ripen for 12 hours or so.

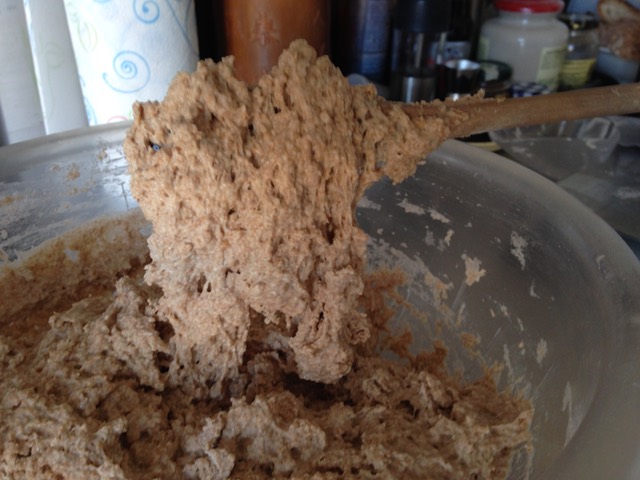
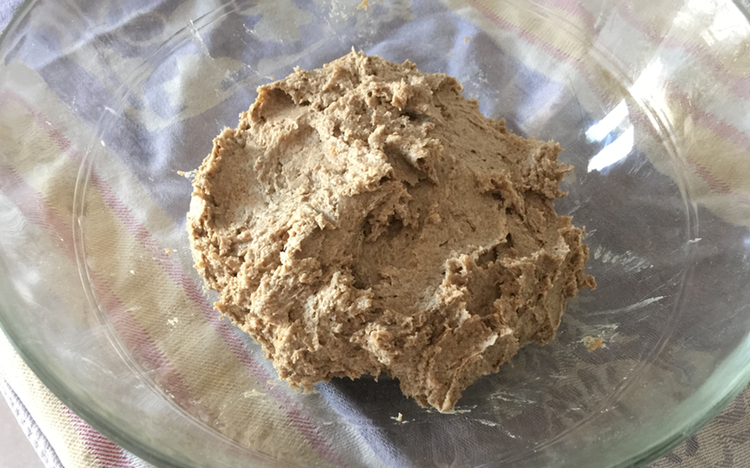
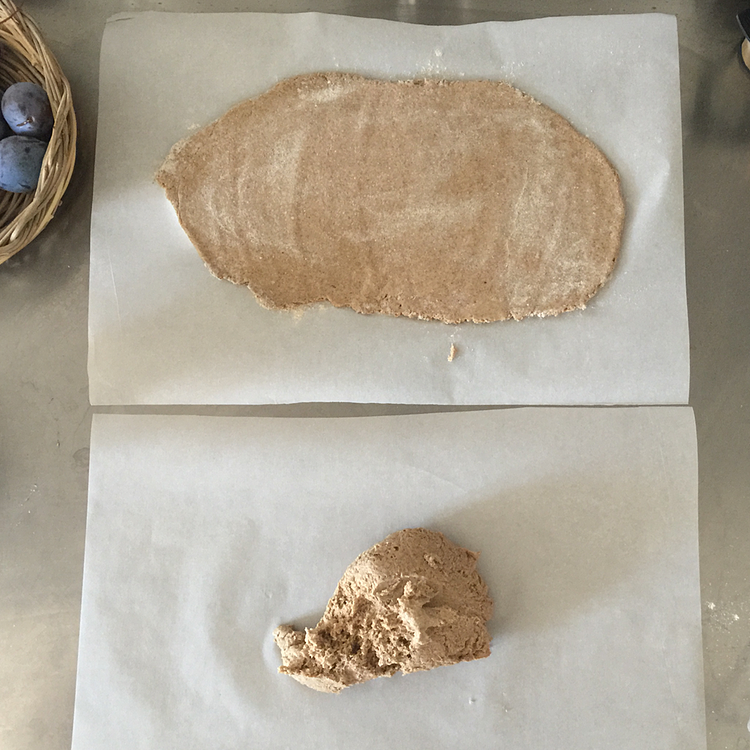
Weigh the leaven into a large bowl, add 700 gm of water and stir about a bit to break up the leaven. Add the salt and the flour. I added the flour in three batches, two of 300 gm and one of 200 gm, stirring well after each batch to make sure all the flour was fully wetted. At this stage the dough is very soft, pretty sticky, and has very little structure. Don’t worry. Turn the dough onto a work surface and do a couple of stretch and folds. The S&F technique is much harder to describe than to do, and every time I do it my hands are too messy to use my camera, but my bread-making friend Dan had some good pics on his site. In essence, and usually with the help of a scraper to start, you pull the dough out to one side and fold it back to the middle. Then the other side. Then backwards, and finally forwards. You end up with a parcel of dough, which even after the first four stretch and folds is way more structured than it was when you began. I do this twice, for what I call one set of stretch and folds.

Return the parcel of dough to the bowl, cover, and allow to ferment for 30 minutes. Turn it out, do another set of stretch and folds, and return to the bowl for another 30 minutes. Feel that structure building up? Return to the bowl, this time for an hour before another set of stretch and folds.

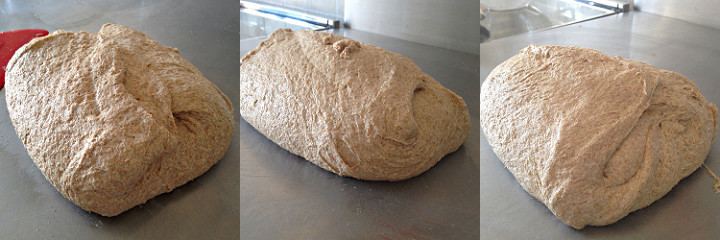
Stretch and fold after 30, 60 and 120 minutes

To recap, you S&F immediately after mixing, and then after 30 minutes, one hour and two hours. My notes say:

  • 9:15 Holding shape.
  • 9:35 Stiff, holding shape.
  • 9:50 Really elastic, 2nd fold hard to stretch.
  • 11:00 Well structured, still a bit sticky, into fridge.

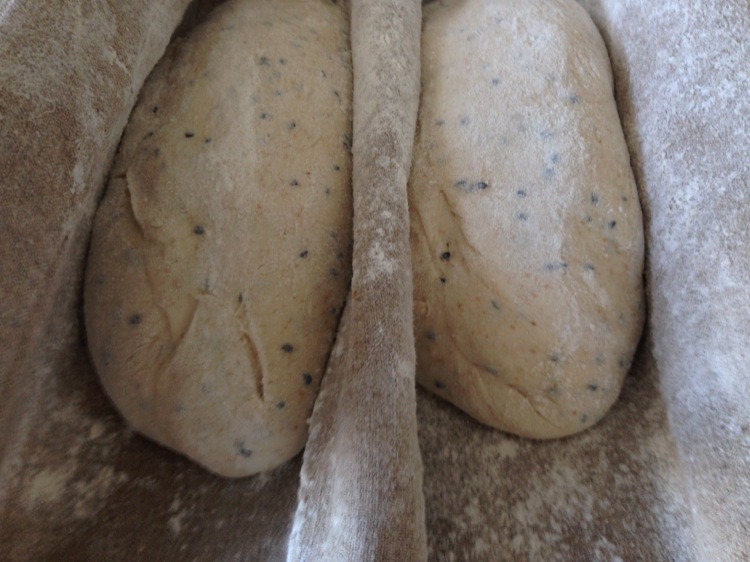
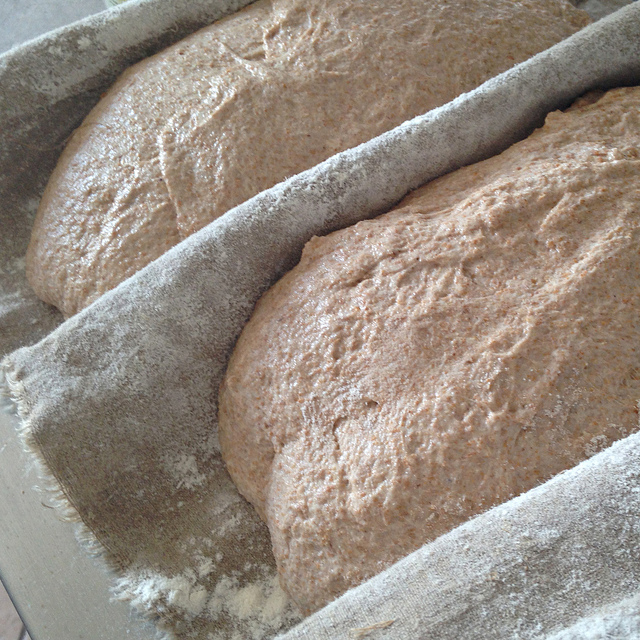
Put the bowl in a plastic bag and put it in the fridge to continue its slow fermentation. I left it in the fridge for 3 hours, but 6 or even overnight would probably be fine. The dough had risen well, easily doubling in volume. Bring the dough out and allow it to warm up for about an hour. Gently scrape the dough out onto the counter and do a gentle stretch and fold. At this stage, handling needs top be very light as you don’t want to get rid of all the gas and bubbles that have formed. Divide the dough parcel in two and shape each as you prefer. I formed batard shaped loaves and put them into a well-floured couche to rise for another hour. That may have been a mistake. The loaves are still very soft, and hard to handle; a banetton or tin might have made life easier.

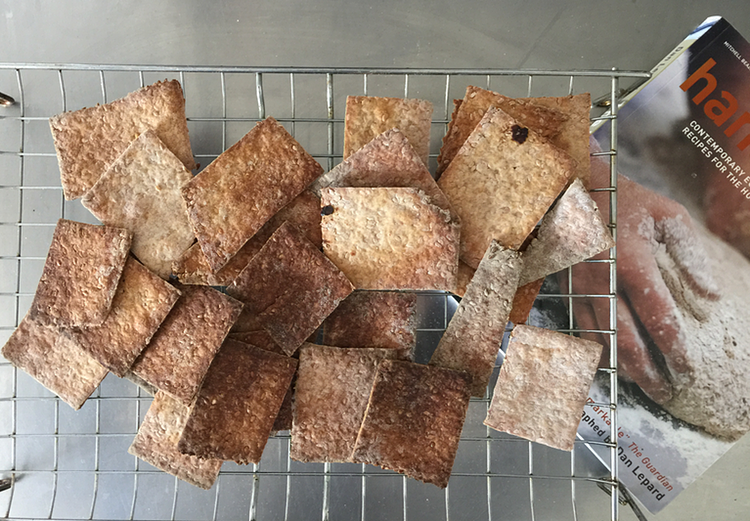
Preheat the oven to 230°C and prepare for steam too. Gently, again, turn the loaves onto a piece of baking parchment, slash to suit, and slide the parchment onto a tray or baking stone in the oven. Bake for 30 minutes, at the end of which remove the source of steam, turn the loaves and reduce the heat to 210°C and bake for another 20 minutes. Test that the bread is done (hollow knocking sound, or internal temperature around 95°C) and if it is turn the oven off and leave the loaves in there for another 5–10 minutes with the door slightly ajar. Cool the bread on a rack and, if you can, wait until thoroughly cool before slicing.

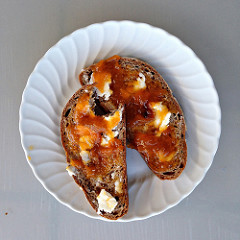
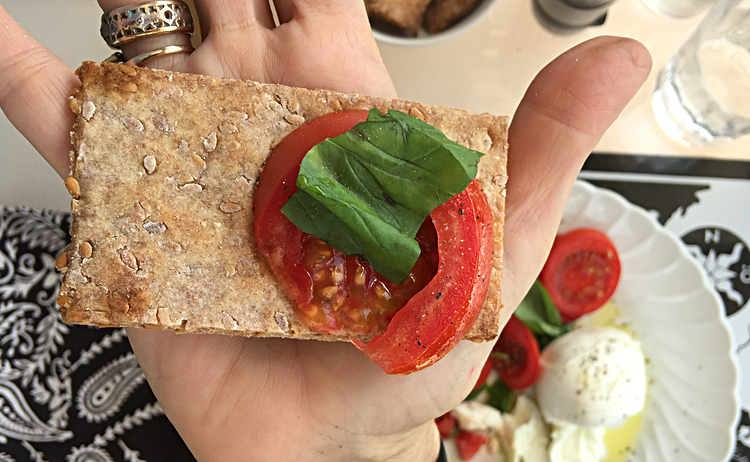
The result? As I said, beyond expectations. This bread is light, the interior soft and open, but not too open, the crust crunchy but not too thick. And the taste has the nuttiness of wholemeal and that interesting sweetness, without any added sugars. A greater contrast with the Grant loaves of my youth I cannot imagine, and yet it was those loaves that made me able to bake this one. Hard to bake? I suppose so, but not really, given a bit of experience. Worth repeating? For sure.

And there’s a set of the images here, if you’re interested.

A couple of weeks ago some of the alumni of Sourdough U and potential new students were in Tuscany, celebrating a milestone birthday, and asked if I could do another bread-making class. Of course. We toyed with bagels, but what’s the point, really, for people who can buy a good bagel any day of the week? And we toyed with pizza, given that the place had a wood-fired oven, but without an expert in wood-fired ovens, which I am not, that would be too tricky. In the end, we settled on Hamelman’s Sourdough Seed Bread, which has become a recent favourite, and it went very well. Not content with that, though, I decided to try my hand at ciabatta.

Ciabatta does actually share one key characteristic with bagels: abominations abound, little breads that have nothing in common with the original beside their shape. The secret to a good ciabatta is a very wet dough — Hamelman’s formulae are 73% and 72% — that permits the characteristic giant holes and blistered crust. Building strong gluten that will hold the gas for holes is a challenge in such a wet dough, and one that seems to require a machine, but I remember reading ages ago a piece by Susan of Wild Yeast about making ciabatta rolls by hand. The key is a technique called double hydration: you make a good strong dough with some of the water, and when that is done incorporate the rest of the water to increase the hydration. I’ve had to add extra water to a dough before, when I’ve made a mistake in measurements, and under those circumstances it can be a real pain. Doing it deliberately sets up different expectations, although working with an 75% dough is not for the faint-hearted. I followed Susan’s recipe and method pretty carefully, although I use slightly less salt.

Ingredients

610 gm ripe starter at 100% hydration
465 gm bread flour
75 gm whole wheat flour
26 gm olive oil
15 gm salt
355 gm water
Extra flour (lots of it) for dusting

Method

Combine the starter with 280 gm of the water, the additional flour, the salt and the olive oil and bring this dough together as a rough mass. Turn it out onto a counter and knead until the dough is smooth and elastic. At this stage hydration is 62% and so the dough might be a bit sticky but should nevertheless be quite easy to knead without any extra flour. It took me about 10 minutes to get a well-developed dough.

Now comes the fun. Return the dough to the bowl and add the remaining 75 gm of the water. At this point, you need to get the water into the dough, rather than slipping around entertainingly on the surface. A combination of squidging through your fingers, folding the dough in on itself repeatedly, whirring your hand around pretending to be a dough-hook; whatever it takes. Hydration is now 70%, and I’d leave it there the first time you try this. As you become more proficient you can go up to 75% (which would mean 115 gm of water in the second hydration) or beyond. The tricky part is not so much hydrating the dough but handling it after the bulk fermentation.

Sticky ciabbata dough.

With all the water in the dough, lightly oil a clean bowl and pour the dough into it. Cover, and set aside for 30 minutes. Give the dough a couple of sets of stretch and folds, either in the bowl or, better yet, on a floured work surface, brushing off any surplus flour so as not to incorporate it into the folded dough. Return to the bowl and stretch and fold again at 60 minutes and 120 minutes (i.e. 3 sets of stretch and fold during the 2 hours of bulk fermentation). It is truly remarkable how much structure the dough gains after a couple of rounds of stretch and fold; Susan has great pictures, I was too preoccupied to take any. At this point, put the bowl in a plastic bag and pop the whole lot into the fridge for 7-12 hours, or overnight.

Remove the bowl from the fridge and allow it to warm up to room temperature for a couple of hours. Dust your worktop with flour (Susan recommends a mixture of half and half flour and semolina, but I used plain flour) and gently turn the dough out of the bowl, trying not to degas it at all. Gently stretch the dough out into a rectangle and divide it into 10-12 portions with a well-floured dough cutter. Equally gently, transfer these to a well-floured linen couche, keeping the floury side (the bottom) down and spacing them well so they do not stick to one another. The cut edges of the pieces are sticky, which makes the whole process of cutting and transferring fraught with difficulty, but with a little bit of luck and a lot of dexterity you can get them into the couche for a rest and further rise, under a cover, of about 90-120 minutes. The rolls will be very light.

Preheat the oven, preferably with a baking stone, to 250°C, or as hot as you can get, and prepare also to be able to steam the oven using whichever method you prefer. Gently flip the rolls onto a piece of baking parchment, slide the whole parchment onto the stone and bake with steam for 5 minutes. After five minutes, turn the oven down to 240°C and bake without steam for another 15-20 minutes until the rolls are the colour you like. I prefer them quite pale. Remove from the oven and cool on a wire rack.

I confess, I was very pleasantly surprised by how well these turned out, and so were the Sourdough U alumni. To consolidate my learnings (sic) I made another batch last Friday, pushing the final hydration up to 75%, and they were just as good, if not better. A lot of work, but really worthwhile.

p.s. Thanks to Christy Lichtenstein for pointing out an error in my original quantities for the total water. Now fixed.