Roscioli in Rome (the bakery, around the corner from the deli/restaurant) does a dark, almost burnt walnut loaf that many people swear by. A couple of years ago I tried to imagine a recipe. It wasn’t good. Then I found a link to an old recipe of Dan Lepard’s in The Independent. I just searched for the link, but it seems to be broken. No matter, though, because I did a full work-up — with pictorial goodness — on my other blog . The secret is the walnut paste in the dough. It gives a flavour boost and imparts a lovely purple colour to the loaf.

I’ve modified the recipe since then, going to a pure sourdough, no commercial yeast. Why? Because I can; nothing purist about it. Here are the details.

For the dough:

100 gm walnut paste (see below)
300 gm active starter at 100% hydration
125 gm water
200 gm strong white flour
100 gm wholemeal flour
50 gm rye flour
10 gm salt
50 gm honey
100 gm walnuts
Oil for kneading

For the walnut paste:

40 gm walnuts
20 gm soft butter
40 gm water
A pinch of salt

First make the paste. Put 40 gm of walnuts, water, butter and salt into a food processor and whizz until you have a soft, smooth paste.

Mix the water into starter (you did make enough to keep some for next time?), add the honey and mix to incorporate roughly. Now add the walnut paste, the flours and the salt and mix well until you have a shaggy mass of dough. Tip in the remaining 100 gm of walnuts and squidge them into the dough. Cover the bowl and leave to rest for 10 minutes or so.

Tip the dough out onto a lightly oiled surface and knead it quickly about 10 times. The faster you work, the less likely it is to stick to the surface and your hands. Return the dough to the bowl, cover, and leave for about an hour. Knead again 10 times quickly. You should notice a definite improvement in the structure, more elastic and less sticky. Return to the bowl, cover, and leave another hour or so.

Prepare your container, a banneton or a tea-towel in a deep bowl, well floured. Knead the dough once more and then shape and place the shaped loaf in the container to rise. This final proofing normally takes about two hours under my conditions.

Preheat the oven to 210℃ (410℉). Turn the loaf out and score a checkerboard pattern on the top with vertical cuts. Pop the loaf in the oven and bake “for about an hour or until the loaf is rich brown and, when tapped, sounds hollow”. Allow to cool on a rack.

One more thing; it makes great toast. If you don’t eat it all fresh. Seriously, this is a great bread. I should add that, glutton for punishment that I am, I have only ever made this bread with freshly shelled walnuts. I’ll bet it is every bit as good with ready-shelled ones, but I wouldn’t wait too long in the season because walnuts can go a bit rancid.

The slightly bitter taste of chestnut flour — along with the nuttiness — makes for an interesting loaf, but some of the recipes I’ve seen, with 50% chestnut flour or more, are a bit too heavy for my taste. I tried a couple at lower levels, around 10%, and they weren’t chestnutty enough. So eventually I settled on 20% chestnut flour. I’ve also taken to adding a little wholemeal (10%) to almost all my bread recipes as it seems to add so much depth of flavour. This is enough for two large loaves.

Ingredients:

740 gm active starter at 100% hydration
250 gm, chestnut flour (20%)
125 gm wholemeal flour (10%)
495 gm strong white flour (70%, with the 370 gm flour in the starter)
18 gm salt
440 gm water (65%, with the 370 gm water in the starter)

In a large bowl, add the water to the starter and mix roughly. Mix in the white flour and allow to rest for 10 minutes. Now add the salt, the chestnut flour and the wholemeal flour and mix well. Tip out onto a lightly oiled surface and knead to incorporate all the ingredients. Return to the bowl, cover, and leave for an hour.

Tip out the dough, knead quickly about 20 times and return to the bowl for a further hour. Knead once again and allow to rise again for an hour. The total bulk ferment is thus about three hours.

Prepare two or three containers; I used two well-floured bannetons, but the dough is firm enough that you can also make three longer loaves and do the final rise on a well-floured couche. Shape the dough, place in the containers, and allow to rise. I put them in the fridge, inside plastic bags, overnight.

Pre-heat the oven to 220°C (430°F), slash the loaves and bake for 25 minutes (20 minutes if you make smaller loaves). Turn the oven down to 205°C (400°F), rotate the loaves, and bake for a further 25 minutes. Cool on a wire rack.

The bread keeps well, and is very good with savoury things like salami.

“Something saporito,” she said. “With bits in.”

The Queen of Thanksgiving Turkeys wanted me to bring bread, and those were the specifications. I thought of a nice foccacia, but the timing was too difficult. A schoolnight, with a heavy day before it would not leave enough time. So it had to be a loaf. And the bits could not be cranberries, for all kinds of reasons. So I settled on sun-dried tomatoes and olives, and with absurd hubris thought I would just wing it. I’ve also been fooling around with chestnut flour and that seemed like a good idea. Also some durum flour. And heck, why not some wholemeal too, for even deeper flavour.

Step one was to activate my 100% starter, in three builds, to give me about 575 gm of leaven at 100% hydration. Weighed out into the big mixing bowl, it came in at 568 gm.

I wanted a total dough weight of 1400 gm at 65% hydration; 850 of flour and 550 of water. The starter provided 284 gm of each, leaving me to add 566 gm flour and 271 gm of water.

Somewhat arbitrarily, I decided on 10% each of chestnut flour and wholewheat flour, 40% of durum flour and the balance of Manitoba. To which I added 100 gm of sun-dried tomatoes softened in oil and 100 gm of green olives in oil. Baked to a rich, dark brown and delivered to the party, I failed to snap a single photograph. But it seemed to go down well. There was a hint of bitterness from the chestnut, which also added extra nuttiness, and the bits were pretty good too, the tomato especially offering little explosions of flavour in many, but not all, mouthfuls.

Saporito? I should say so.

Here is the detailed method.

Starting 24 hours before mixing, build starter. To 20 gm of starter, add 20 gm of soft flour and 20 gm of water, stir to mix and leave in a warm place for about 8 hours, until it is light and bubbly. To this, add another 95 gm each of flour and water, mix and leave another 8 hours. Finally, add 165 gm each of flour and water, mix and leave.

Weigh 570 gm of starter into a big mixing bowl. Add 271 gm of water and 330 gm of durum flour. Mix, and leave for 20 minutes to autolyse.

Prepare the tomatoes and olives. Drain off the oil and cut the tomatoes into strips about 1 cm wide. I use scissors for this, and to cut the olives in half crossways. Much easier than fiddling with a knife.

Add remaining dry ingredients — 85 gm fine chestnut flour, 85 gm wholewheat flour and 66 gm of strong bread flour — mix until you have a shaggy mass, then tip out onto the counter and knead to incorporate all the flour.

With bitty loaves like this one I vacillate about adding the bits with the flour or trying to incorporate them afterwards. Just the tomatoes, and I would add them with the flour, but you don’t want the kneading to break up the olives too much. So this time I patted the dough out on the counter, spread the cut up tomatoes and olives on it, rolled the whole lot up and started to knead gently. This is tricky. The oil around the bits tends to prevent the dough mixing in on itself, but persevere and gradually it will change from dough and bits more or less separate to dough with bits in.

Return the dough to the bowl and cover. After 45 minutes, tip the dough out and give it a quick stretch and fold. Return to the bowl and leave for another 45 minutes before giving another stretch and fold. Finally, return to the bowl and allow to rise for another 2 1/2 hours.

Tip the dough out onto a lightly floured board, divide in two and shape as you prefer. At this point I slipped the shaped loaves, in their bannetons, into a plastic bag and put them in the fridge overnight. I had to, given the timing. But I also wanted to, because the long, slow fermentation would help build lots of flavour. If you don’t refrigerate, allow the loaves to rise for an hour or so.

Heat the oven to 220°C (430°F), gently ease the loaves out onto a tray, slash and bake for 20 minutes. Turn the oven down to 205°C (400°F), rotate the loaves on the tray, and bake for a further 20 minutes. Cool on a wire rack.
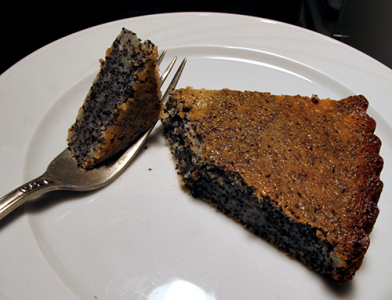
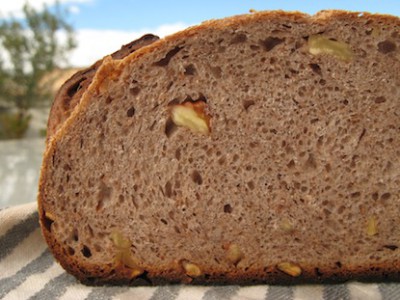
This story starts when my pal Joanne persuded me to reverse engineer a loaf she had bought at some swell place in NYC.1 That done I looked around for other similar recipes, and found one at YeastSpotting. Over time I’ve modified it a bit, mostly by removing the fresh yeast and relying entirely on my 100% leaven. This version makes two smallish loaves.

Ingredients

195 gm ripe 100% hydration starter. I build with ordinary soft flour
220 gm strong bread flour
220 gm durum flour
245 gm water
10 gm salt
22 gm olive oil
110 gm sultanas (seedless!) or raisins, or currants
70 gm pine nuts
10 gm fennel seeds (optional)

Method

Mix the starter, water, flours, starter and olive oil in a large bowl and mix until combined. Turn out onto the counter and knead for about 5 minutes to a smooth, elastic consistency. Add the sultanas or other dried fruit, the pine nuts and fennel seeds (if using) and knead until the additional ingredients are well incorporated into the dough.

Form into a ball and place into a lightly oiled bowl to bulk ferment for 2 hours.

Turn the dough out onto a lightly floured surface, press out gently and divide into two portions.2 Shape the dough as you prefer and allow to rise for about another 1 1/2 hours.

Preheat the oven to 230°C and prepare to use steam.

Slash the loaves and place them in the oven, with steam. Bake for about 10 minutes. Then remove the steam, turn the temperature down to 220°C and bake for a further 20 minutes. Test the loaves for doneness and if done turn the heat off and leave them in the oven with the door slightly ajar to help them dry out. Place on a wire grill to cool.

Durum loaves often dry quickly, but the sultanas help to keep this one softer longer. I like the contrast of the sweetish bread with salty salami and cheese. It also toasts well.

Notes

  1. That recipe will eventually be transferred over here. And right now she’s back there again, so maybe she’ll get the recipe they actually use, this time.a
  2. You can also divide into three or four, as Susan at YeastSpotting does, and bake as mini-baguettes, but I prefer a larger loaf.a

Saveur magazine’s May 2012 issue promised that I could “learn to bake like a pro,” and had a bunch of interesting sounding recipes. Interesting, and weird. For all kinds of reasons. So I thought it would be fun to, er, reinterpret them for people who were reasonable bakers, and had no desire to bake like a pro. I decided to start with Apple Cider Levain Loaf. Big mistake.

The two weird things about the Saveur recipes are the amounts and the instructions, especially with regard to their “levain”. They start with 1/4 teaspoon of dried active yeast, and feed that each day with equal volumes of “all-purpose” flour and water. Helpfully, they do the math: “4 ¾ cups plus ⅔ cup and 2 tbsp. (1 lb. 9 ⅓ oz.) all-purpose flour”. I think 2 tablespoons of flour is 1 fluid oz. So the total volume of flour is 44.4 fl oz., and the total weight 25.33 oz. and a Saveur cup of AP flour weighs 4.6 oz. In which case, given equal volumes of flour and water in the starter, the hydration of the start is 174%.

Drippy.

More to the point, how much else is going to be in there apart from commercial yeast? Is it really worth 10 days of buggering about if all you probably have is commercial yeast?

My Starter

So the first thing to reinterpret was the starter. Saveur builds 1/4 cup of its levain with 1/3 cup of water, 3/4 cup bread flour (a cup of which, confusingly to me, weighs 5 oz. rather than 4.6 oz.) and 1/4 cup apple cider. I’m assuming they mean apple juice. Ignoring the 1/4 cup starter, the hydration of this build is pretty close to 125%.

OK! That bit was easy! Not surprisingly it smelled faintly fruity, bubbled a treat, and was ready to roll this morning.

To about 70 grams of 100% hydration starter, add 75 grams of water, 57 grams of unsweetened apple juice and 107 grams bread flour. Stir to mix, cover, and leave for 12-24 hours.

The Dough

Back to those dumb volumetrics; Saveur calls for 2/3 cup water, 3/4 cup “cider,” aka apple juice, and 3 1/4 cups bread flour, which translates, at their rate, to 16 1/4 oz. I decided to go metric now, rather than later, at 28.8 rather than 30. (Why? Because it gives 150 gm of water and 175 of apple juice, as near as makes no difference.) Plus 50 gm of dried cranberries (because I didn’t have the 2 oz. the recipe calls for) and 15 grams of salt.

The whole lot is allowed to autolyse for 20 minus, and although it looked pretty gloopy, I thought it might just thicken up a bit.

No such luck. Knead for 10 minutes, the recipe said, which I dutifully tried to do, although to tell the truth I was really just using my dough scraper and one hand to move a very thick batter around on the countertop. Somehow I scooped it all back into the bowl and cleaned up, leaving the goop to bulk ferment for one hour.

At which stage, after an interminable time washing up, I came to write up my notes. And discovered that on Saveur’s own recipe page, people were not happy.

“Just forget it. Avoid this recipe. It’s just plain wrong,” said Mr Mambo. His math differs from mine, but I feel his pain. “I’ve now wasted a week and a half of prepping a starter and too much flour to count…all for nothing. I hate you right now, Saveur. I really, really do.”

LKYMOM didn’t follow the recipe too exactly (no apple juice, raisins instead of cranberries, and an unspecified amount of additional flour). “I just figured I’d bake it and have an ugly loaf. But to my surprise it rose quite a bit and was very moist and tasty ( although the loaf itself is like five pounds).

“I will not, however, make this recipe again.” Nothing daunted, though, she says she is “moving onto the Filone”.

And the final commenter, Kclement, asks “Was anyone successful following this recipe as it was printed?! I followed it as written and was totally unsuccessful. I would hope that all Saveur recipes are tested before they are run in the magazine.”

Scrape all of the starter into a larger bowl and add 150 grams water, 170 grams apple juice, 470 grams bread flour, 50 grams dried cranberries and 15 grams salt. Stir to make a dough, and allow to rest for 20 minutes. Turn onto counter and knead for 120 minutes. the original recipe says “until smooth and elastic,” but that’s never going to happen. Return to bowl, and allow to ferment for one hour. Stretch and fold in the bowl, and allow to ferment, according to the original recipe “until doubled in size, about 3 hours”. That’s probably never going to happen either.

Me too

I would hope so too, but I’m not encouraged. The recipe says that after a bulk ferment of one hour I should do a fold and return the dough to the bowl, “seam side down”. that was never going to happen. Seam, what seam? I did 20 quick stretch and folds in the bowl, and I’m still not too impressed.

Now what? The recipe actually calls for it to be baked in a greased tin. That makes sense, given how slack the dough is. I think I’ve still got a tin somewhere. Or should I add flour to being it back to a reasonable hydration? I’m somewhat inclined to the former. In any case, I have about 2 1/2 hours to decide.

In the end, not adjusting the recipe seemed fairest. Not having a tin, I had to improvise with barking parchment, which was fine as long as it was held up in a plastic food box. The blob rose pretty well, I have to admit, but as soon as it his the stone in the oven spread out with a vengeance. Just a couple of minutes now before I test to see whether it is done.

And it was. A thick pancake-like object. Now cooling down. Taste test later tonight.