Successful panis quadratus seen in elevation

Panis quadratus, an offering to Fornax.

My visit to Ostia Antica last year, guided by the wonderfully knowledgeable Farrell Monaco, was destined to end in more than a podcast. There was no way I was going to be able to avoid attempting a panis quadratus of my own, and what better time to make the effort than during Fornacalia?

This is the festival during which ancient Romans made offerings to the goddess Fornax. She was charged with ensuring that when they parched the wheat, which made it easier to mill, the grain did not burn. I did not go as far as making my own mola salsa, but I had to attempt the bread, using Farrell Monaco’s latest iteration for a particularly festive version with fennel and poppy seeds and fresh parsley.

First effort at panis quadratus; the demarcations have almost vanished because they were not deep enough.

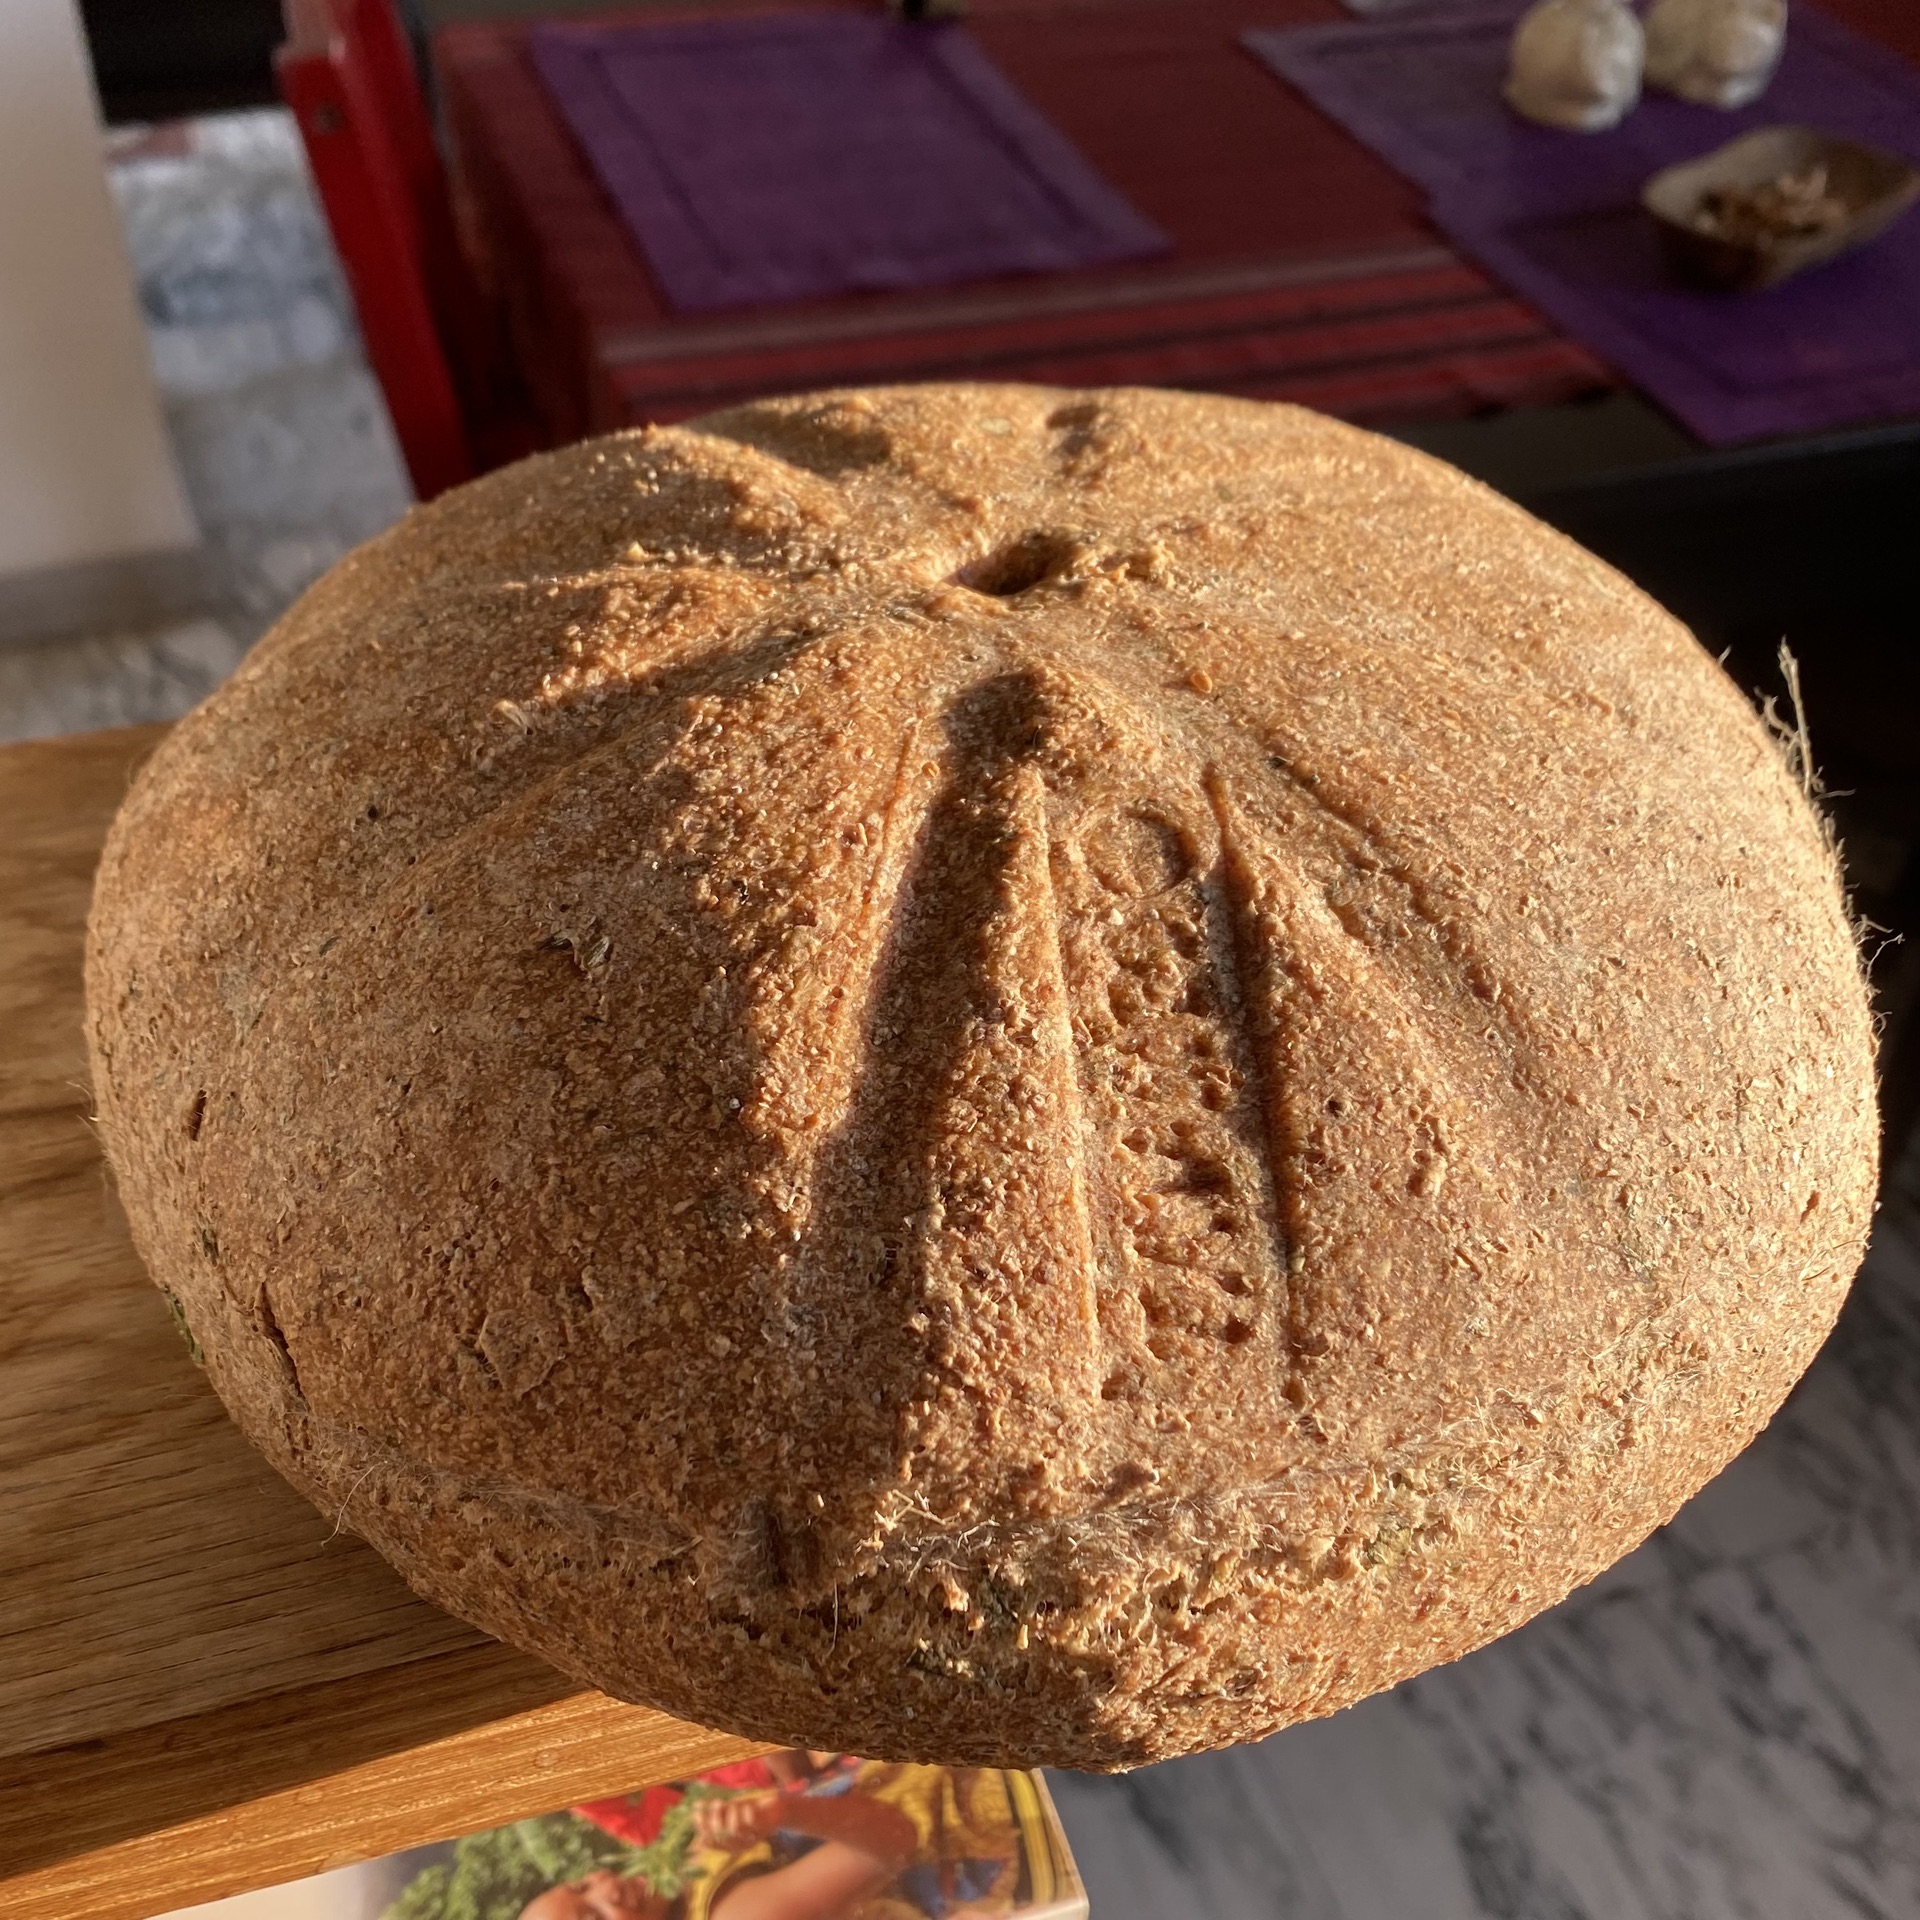
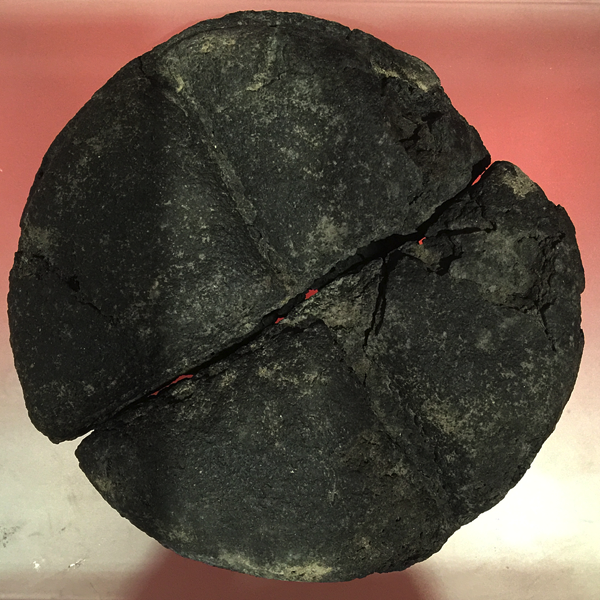
First attempt at panis quadratus. I was too timid with the demarcations, which almost vanished as a result

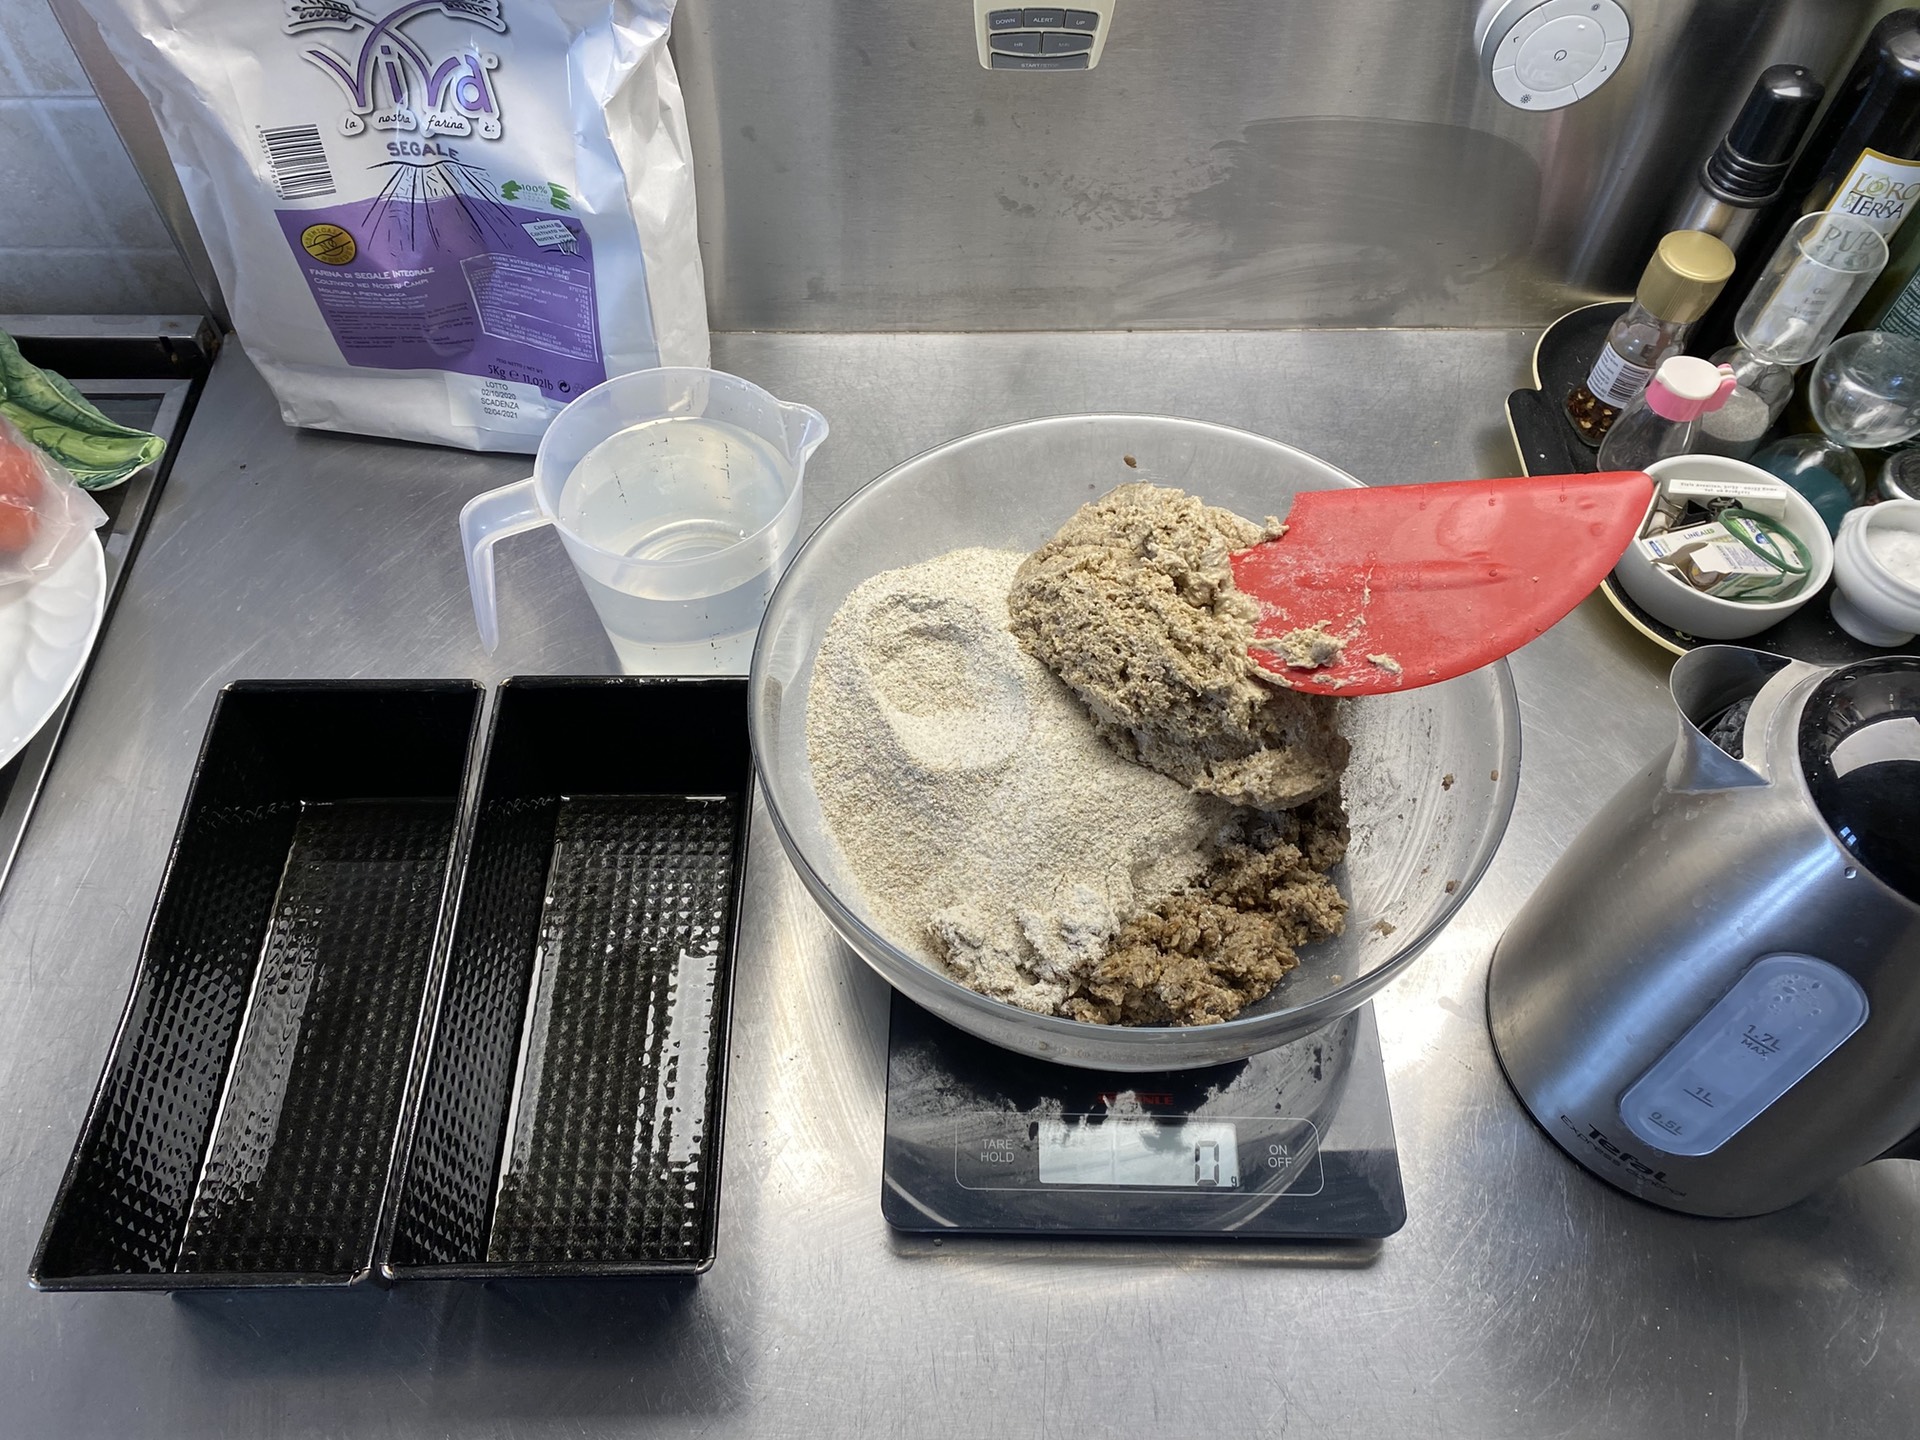
I’m not going to go into much detail, because thanks to her research and experiments Farrell’s articles tell you all you need to know and plenty more besides. The dough is actually very easy for a slightly experienced baker. It is quite stiff, about the same as my usual bagel dough, but being 100% wholemeal never quite becomes as smooth and elastic. Its stiffness, in fact, makes me really curious about the kneading machines that we saw in Ostia. Could wooden paddles really have had any impact on a 55% hydration dough of 100% wholemeal flour? I’d love to see a reconstruction in operation.

Anyway, the relatively small amount of leaven means it doesn’t rise very quickly, so on my first attempt I put it in the fridge overnight because I didn’t fancy staying up into the early hours even to please Fornax. The second time, I started much earlier in the day — about 8:00 am — and had a baked loaf by 5:00 pm.

Loaf before baking with string tied around the equator, much deeper demarcations and the impressed bread stamp

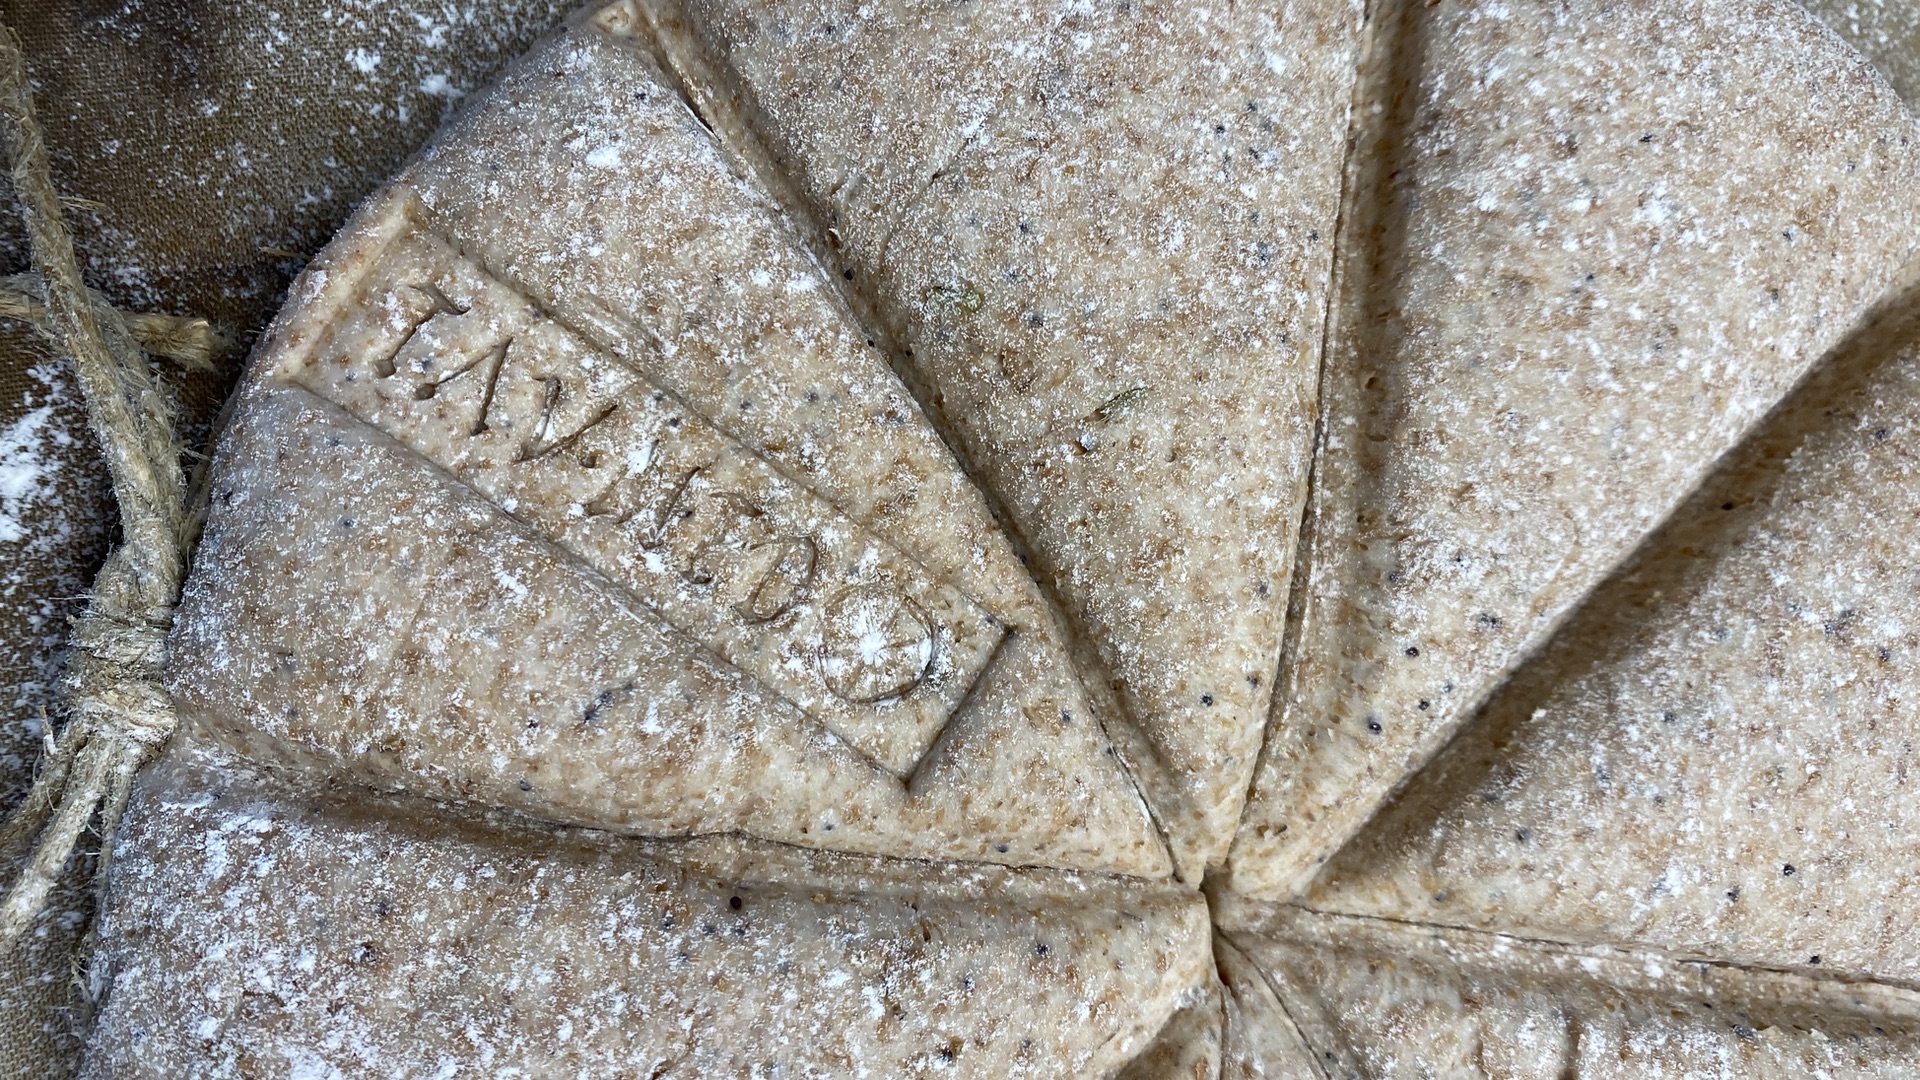
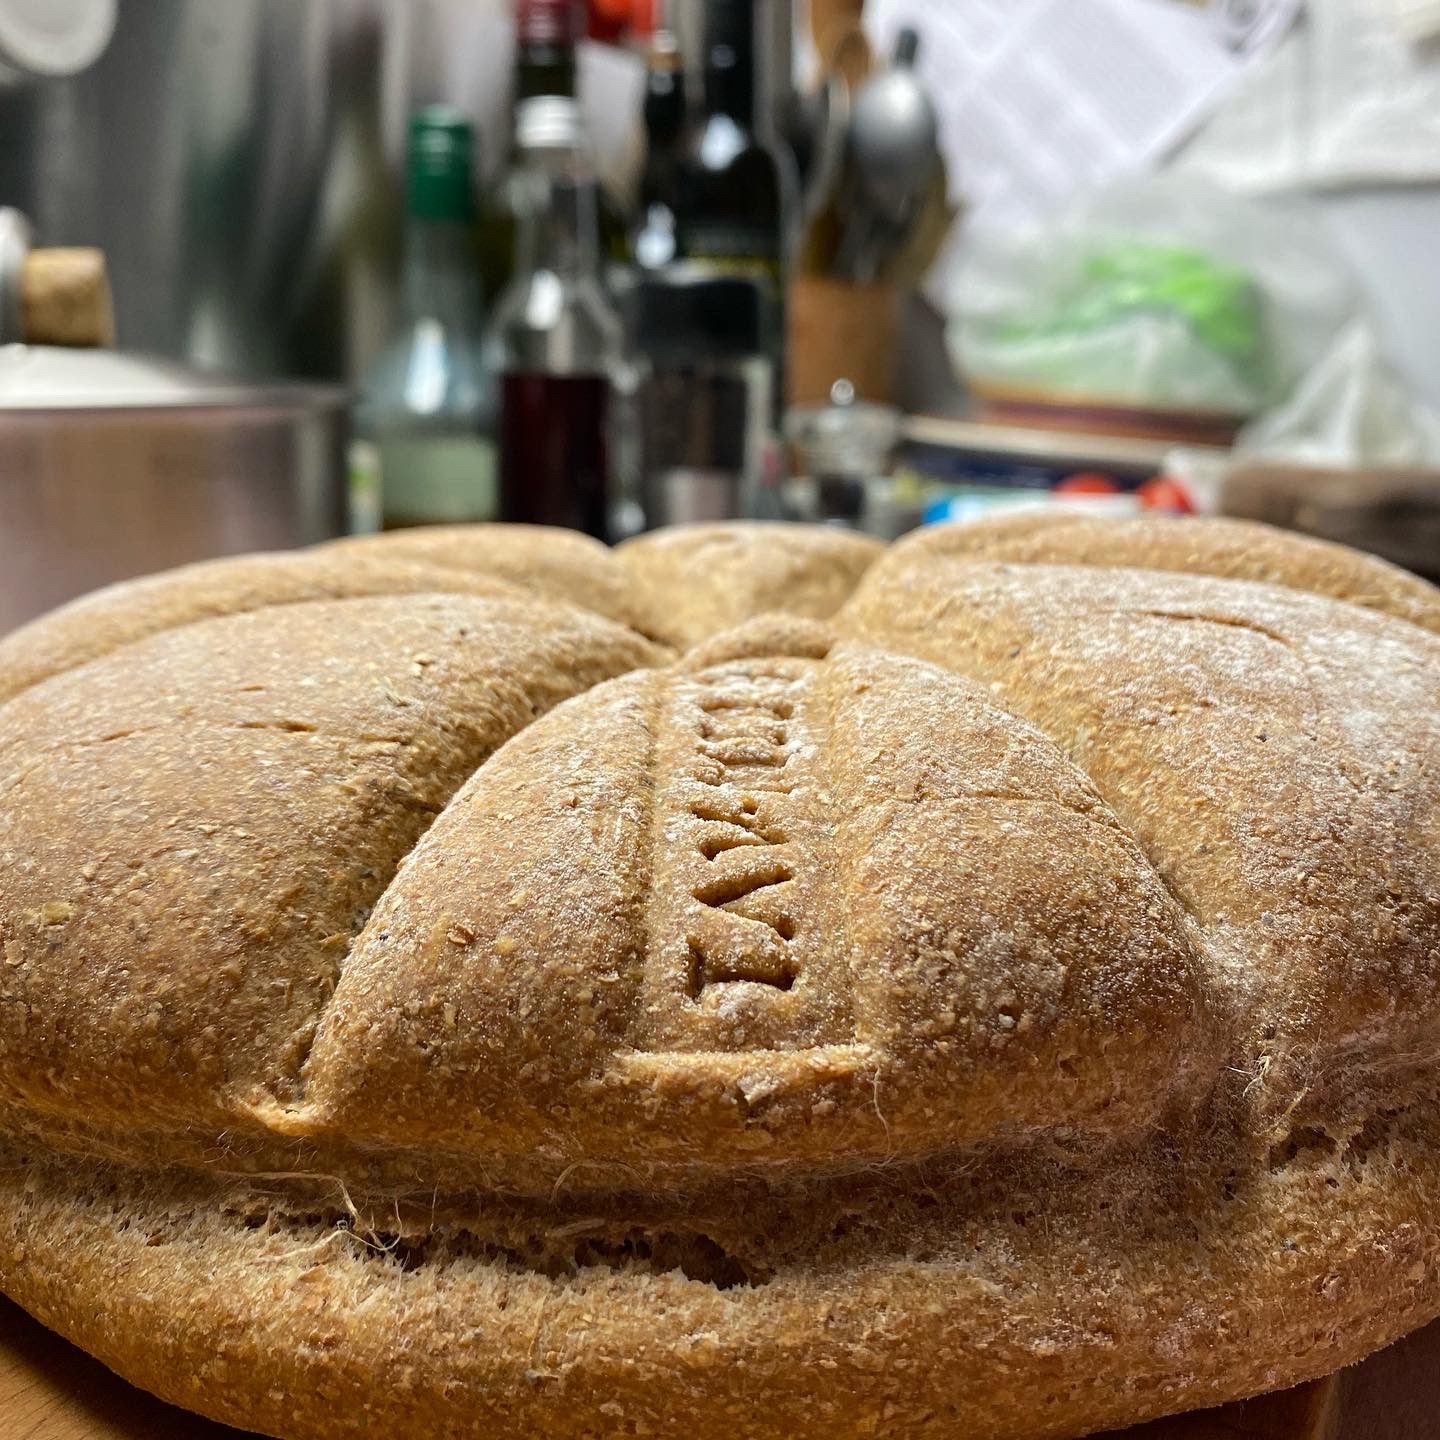
Second attempt ready for baking, with much deeper demarcations.

The tricky part is not the dough but the shaping and handling. The key elements of panis quadratus are the belt around its equator and the divisions pressed into the top to demarcate the sections. Tying the string, of finest Italian hemp, was a little bit fiddly for my fat fingers. And on the first trial, I was much too timid about pressing my reed (bamboo, actually) into the top of the dough. As a result, just as Farrell foretold during our visit to Ostia, the oven spring all but obliterated the marks. The next time I bore down on the bamboo and the marks survived well. And even though mine were the only loaves in my oven, for the finishing touch I did mark them with the bread stamp Farrell sent me.

The finished panis quadratus, fresh out of the oven, its demarcations and stamp intact

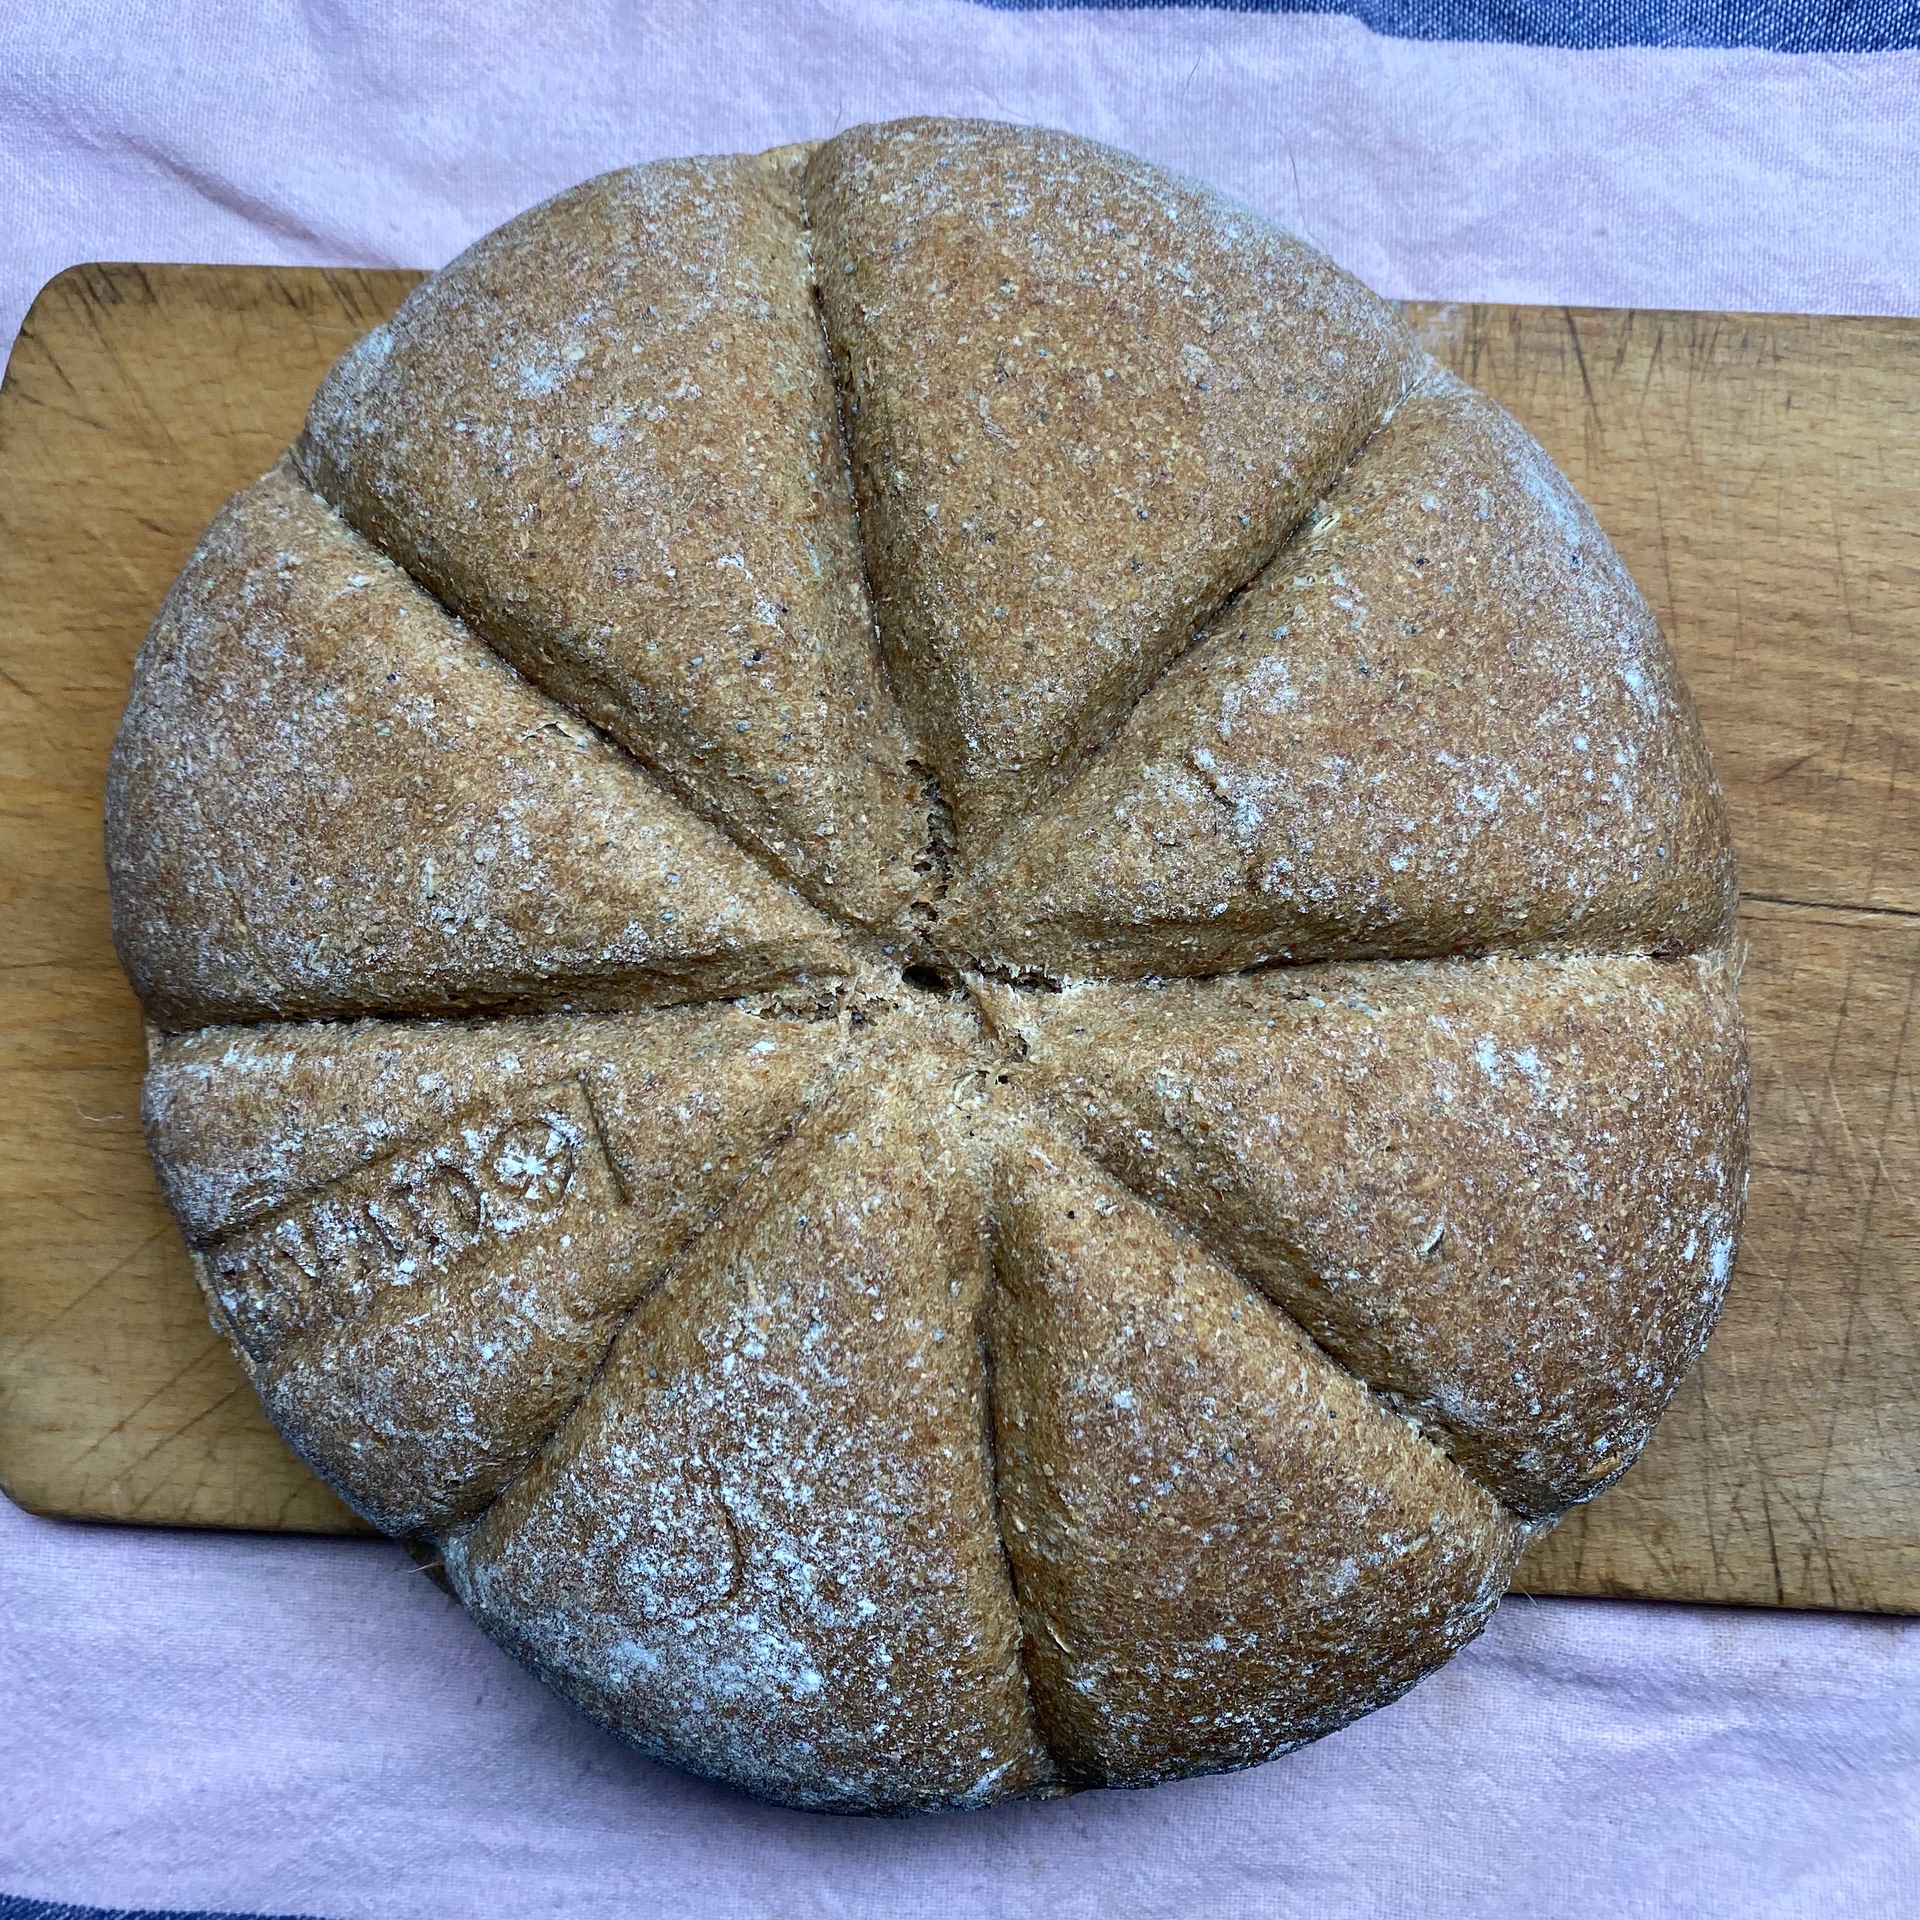
Second attempt just out of the oven, with the demarcations clear and the bread stamp visible.

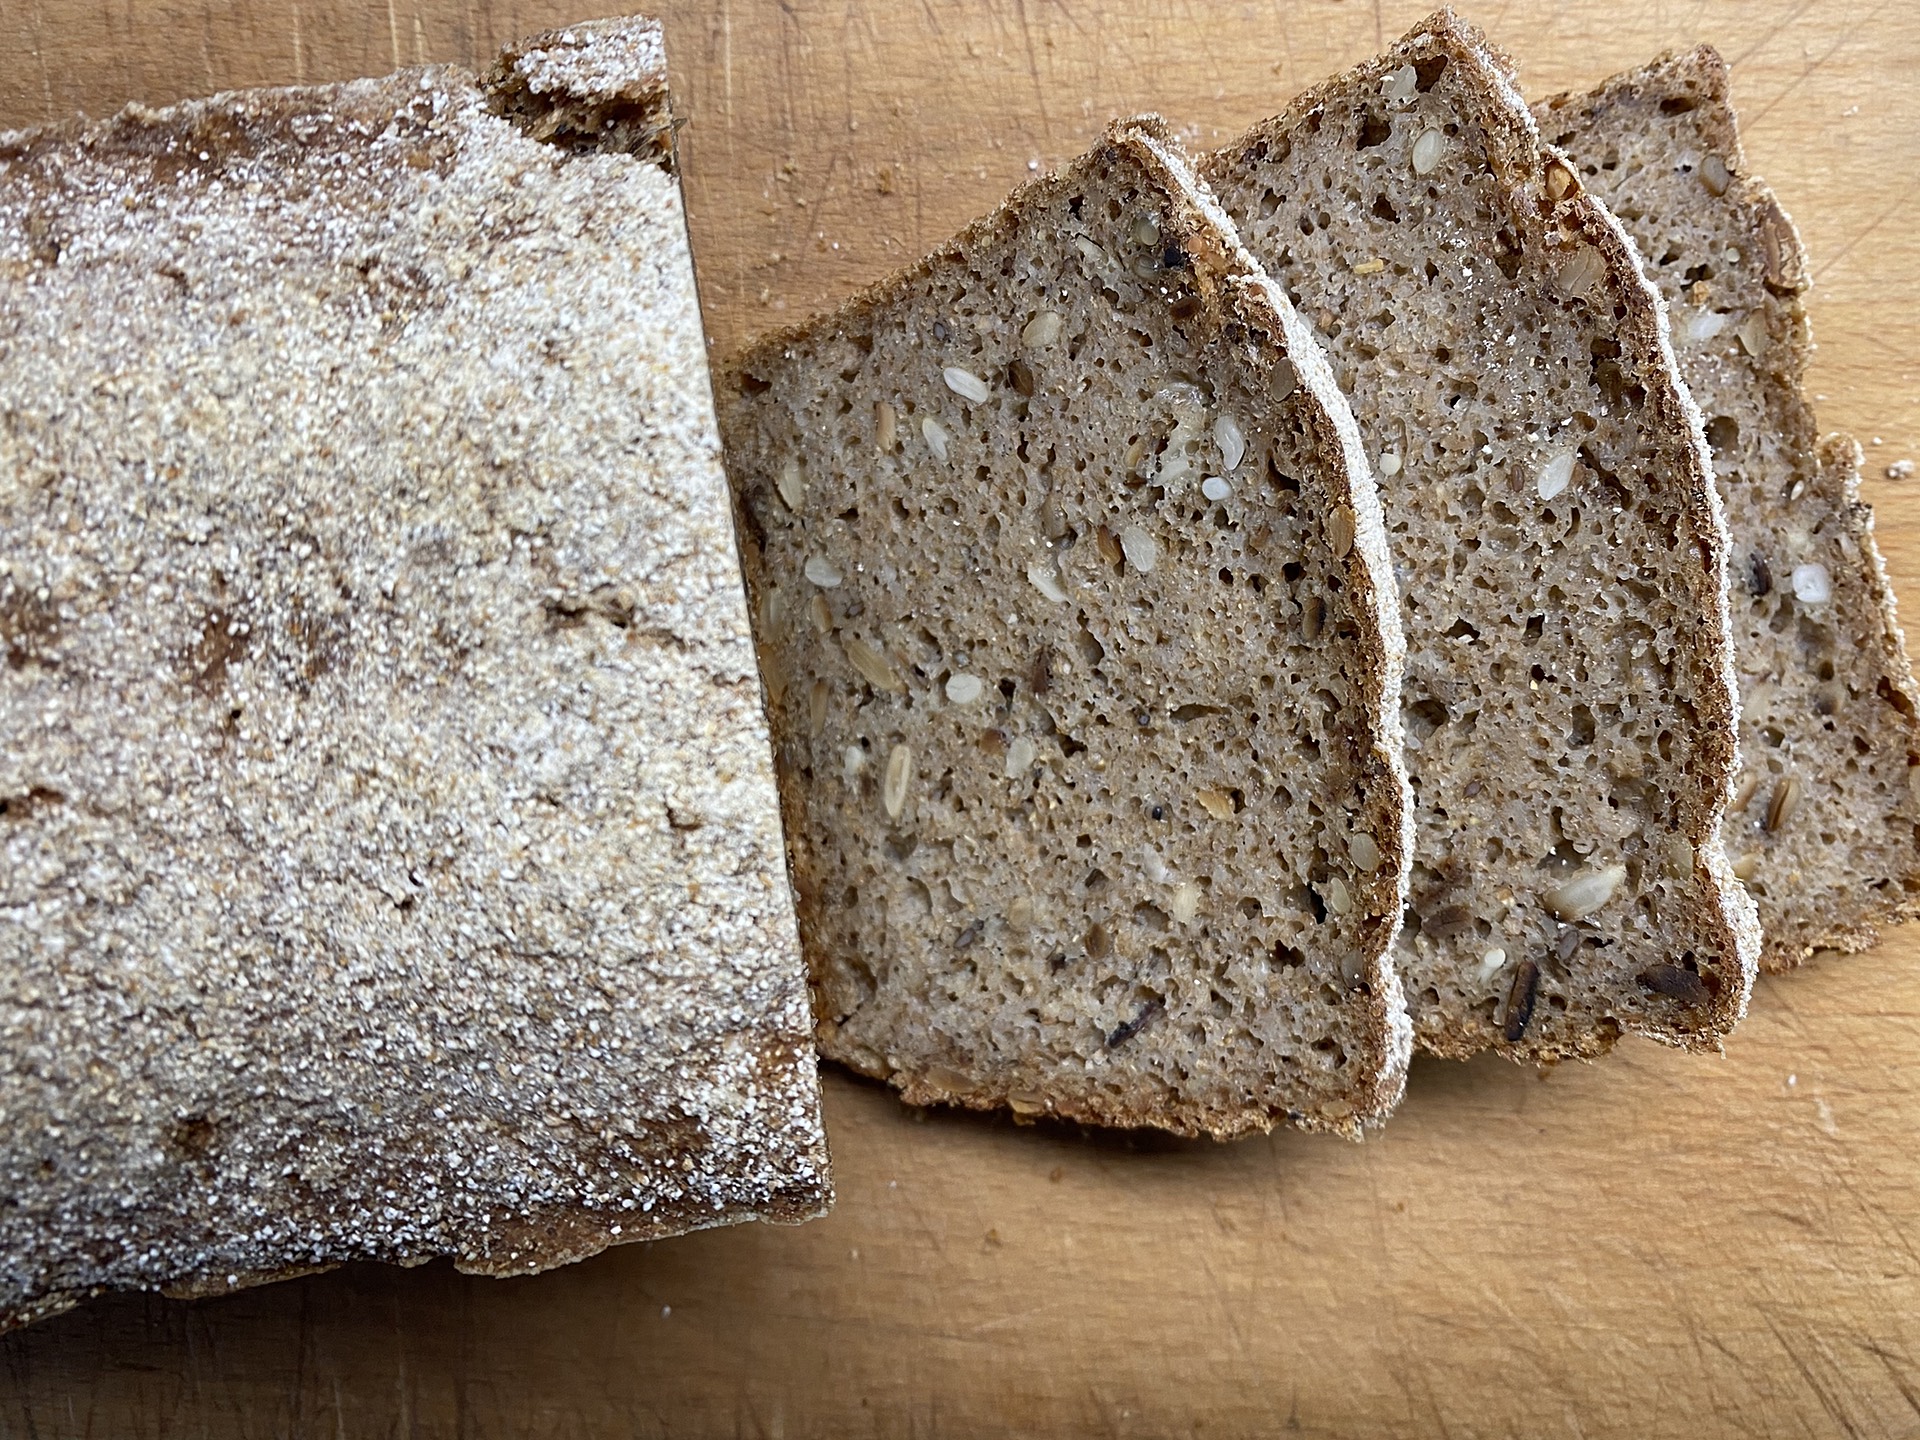
As for the taste, it really is rather good. The bread is by no means light and fluffy, but it is not hard to chew either. It is soft, without being fluffy, and the taste of the poppyseeds and especially the fennel, comes through in every bite. I really like it with some well-aged sheep’s milk cheese, although it is also very good with a little butter and honey.

Fornacalia ends tomorrow. I reckon I will be in Fornax’s good graces for another year.

Today, 7 February 2021, sees the start of the Roman festival of Fornacalia, namesake of this website. Curio maximus Farrell Monaco (or should that be Curia maxima?) decreed it so, as is her right. She suggested we bake Bread for the Gods: Mola Salsa; I am not ready for that and so, once again, I baked a very un-Roman bread. I’m sure the Romans knew of rye, but I don’t think they baked with it. Caraway they knew, sunflower seeds absolutely not. Anyway …

This is now the third time I have baked David Kaminer’s 100% rye sourdough. The recipe seems complicated at first glance, but it really isn’t, and I am sharing it here (finally) only because I have successfully reduced the quantities to make two good-sized loaves (about 2.1 kg of dough) and need to have a reference for myself. It takes a while, but very little of that requires any activity. Ideally, if you start to build the leaven on the morning of day one, you will have bread to eat on the morning of day three.

Slices of rye bread with sunflower seeds

It goes roughly like this:

  • Day one, morning, first build of leaven

  • Day one, late afternoon, second build of leaven

  • Day one, late afternoon, make soaker

  • Day two, morning, mix final dough

  • Day two, 3–4 hours later, bake

  • Day two, allow to cool completely and “settle”

  • Day three, you may now eat your bread

Leaven

  • 675 gm at 100% hydration

I build the leaven in two stages. It really does not matter what kind of starter you start with. I generally use my 75% hydration wholemeal starter, but given that it makes up only about 2% of the leaven, it makes no difference.

  • 15 gm starter
  • 30 gm whole rye flour
  • 30 gm water

Mix up the first build of the leaven and leave to double or more in volume. Mine usually takes about 6 hours to do so.

  • 75 gm leaven
  • 300 gm whole rye flour
  • 300 gm water

About 4–5 hours before bed time, build the leaven again. It wants some time at room temperature before you put it into the fridge to continue fermenting overnight.

Soaker

  • 140 gm whole rye flour
  • 140 gm toasted sunflower seeds
  • 9 gm caraway seeds
  • 20 gm salt
  • 145 gm water
  • 70 gm old bread

I usually make the soaker immediately after the second build of the leaven and, as per David Kaminer’s tip, I make it in the final mixing bowl, because cleaning.

The only tricky part is the old bread. If this is your first time, you might not have any. That doesn’t matter, just leave it out, but try to save 3 or 4 slices from this bake for the next time you want to make this recipe, which you will. It adds a lot of depth. David is suitably vague about the amount of old bread, but I have found that 70 gm of dry bread is good for me. At the very start of the process I put it into a jug of water to absorb all the water it can.

Toast the sunflower seeds, either in a big skillet or under a grill, until you get a good whiff of that nutty aroma. Mix with the flour and salt. Add the old bread, squeezed, but not too much, and broken up as best as you can. Then add the water and stir everything to combine well. Cover and leave to stand overnight.

Final dough

Mis en place for final dough mixing

  • 675 gm leaven
  • 525 gm soaker (approx.)
  • 450 gm whole rye flour
  • 470 gm hot water (40°C)
  • Loaf tins

Before you begin, prepare your loaf tins. Mine are quite small in cross-section, and I keep meaning to invest in some larger ones, but thanks to Brexit I can’t get the ones I should have got last year. No matter. Although the tins are supposedly non-stick, a decent coating of oil helps a lot.

Remove the leaven from the fridge and add it to the soaker in the bowl. Add the rye flour and the hot water. (I have a kettle that tells me the temperature of the water, so I set it to boil and remove it when it hits the mark.) Measure the water and pour it into the bowl. Now things get sensuous.

Keeping one hand clean and a scraper handy, squidge the dough through the fingers of your other hand. The video here shows exactly what I mean. You cannot knead this dough, but you do need to ensure that it is very well mixed. It feels somewhat strange at first because the water is hot and the leaven is cold and you move from one to other in unexpected ways. Soon, though, the whole thing is of an even consistency and temperature.

Scrape your hand clean and then persuade the dough into the tins. I like to use a scale to ensure that the tins contain the same amount of dough. With wet fingers, pat the dough down to level it in the tin. Now sift a little rye flour over the top of the dough, aiming for a light and even covering.

Put the tins somewhere warm to rise. They are ready when you can see nice cracks opened up in the rye flour, but in truth in my tins the dough only rises about 1 cm, if that.

Preheat the oven as hot as it will go, starting roughly when you notice the first small cracks in the rye flour. The loaves will be ready to bake 45 minutes or so later.

Bake at about 245°C for 20 minutes, then lower the temperature to about 205°C for another 60–70 minutes. Remove the tins from the oven and allow to cool for about five minutes before extracting the loaves and then allowing them to cool on a rack for at least 18 hours. Most bread, and especially rye bread, is a lot tastier after it has been allowed to cool properly, and rye needs a good long while to become soft and moist rather than gummy.

At some point before you finish the loaf, cut three or four slices and allow them to dry before putting them somewhere safe, so that next time you can add the old bread as you should.

Lately I’ve started baking in greater bulk to satisfy my slowly growing list of people who pay me the ultimate compliment of paying for my bread. That could make sharing recipes here a little bit tricky, because not everyone wants to handle four loaves worth of dough at a time. ((I would love to get up to 12 loaves a time, but not with my current oven!)) Anyway, thanks to the miracle of baker’s math, I can give the quantities for a single loaf just as easily, so here goes.

Pre-ferment

I use my 100% hydrated leaven to start the pre-ferment, and as I store it in the fridge between bakes, that requires two builds to get it good and active, starting the morning before I want to start baking. To about 10g of starter I add 25g of flour and 25g of water, leaving that for about 12 hours to double. I then feed again with 25 g of flour and 25g of water, leaving it overnight. Next morning, I take 10 gm into a clean container and feed again with 25g flour and 25g water. This stays out on the counter for about 6 hours then goes into the fridge for storage.

The active starter goes into the pre-ferment.

  • 50g active starter at 100% hydration
  • 150g water
  • 250g strong white flour
  • 4g salt

First mix the water and the starter to break up the starter a bit, then add the flour and salt and stir well to incorporate everything into a rough dough. Put that aside to ripen. My kitchen is still pretty cold, so after a day the pre-ferment had barely moved and I had to put it into the fridge overnight. Next morning it had almost exploded out of its box. In warmer conditions, the pre-ferment will double in about 8-12 hours, but it really doesn’t matter much if you refrigerate to suit your schedule.

Final Dough

  • 50g whole rye flour
  • 50g wholewheat flour
  • 50g einkorn flour
  • 350g strong white flour
  • 185g water
  • 4g salt
  • 1/2 tsp dry yeast or 15g fresh yeast (optional)
  • All of the pre-ferment

The einkorn was my idea. If you don’t have any, add 50g of some other flour or just use 400g of strong white flour, rather than 350g. The yeast is completely optional, useful if you are in a hurry (or your kitchen is cold).

Mix the flours, salt and water and yeast if you’re using it. Knead the dough so that it has started to come together and then add a chunk of pre-ferment at a time, kneading between each chunk to start incorporating it into the dough. I guess about 4 or 5 chunks is right. It takes a bit of kneading to get everything properly mixed in but recently I have found this easier than mixing the pre-ferment with the water first. When the dough is uniform throughout, return it to the bowl, cover with a cloth and leave to bulk ferment.

After one hour, do one set of stretch and folds right there in the bowl. Wet your hand first and slip it gently under the dough, grab and pull up slowly, you don’t want to tear the dough, then fold it back onto the top of the dough and work your way around the ball of dough.

One (moving) picture being worth a thousand words, here’s my video.

Leave to bulk ferment for another hour, then do a second set of stretch and folds.

After a final hour of bulk fermentation, gently move the dough out onto the counter, shape, and prove for about 90 minutes before baking in a hot oven for about 50 minutes, with steam for the first half of the bake.

Panis quadratus, carbonised at Pompeii

When first I came across the ancient Roman festival of Fornacalia, back in 2010, it seemed to me an ideal opportunity for newly inspired bakers at home and in bakeries to celebrate their art. Two years later, I even left a desperate little plea to that effect in a forum I frequented. It died a death, as it has most years subsequently, a notable exception being Dan Etherington’s post Fornacalia, Fornax and burnt spelt. Like my leaven, though, which refuses to die, I’m going to give it another go.

I’m emboldened to do so by Chris Aldrich, who took it upon himself to anoint me curio maximus. As such, it is my duty to proclaim Friday 16 February, an auspicious day for me, the day to celebrate Fornacalia, using the hashtag #fornacalia.

I’ve been doing a little research of my own, torn between the Scylla of tried-and-tested and the Charybdis of new-and-appropriate, and I think I have come to a decision.

Stay tuned. And spread the word.