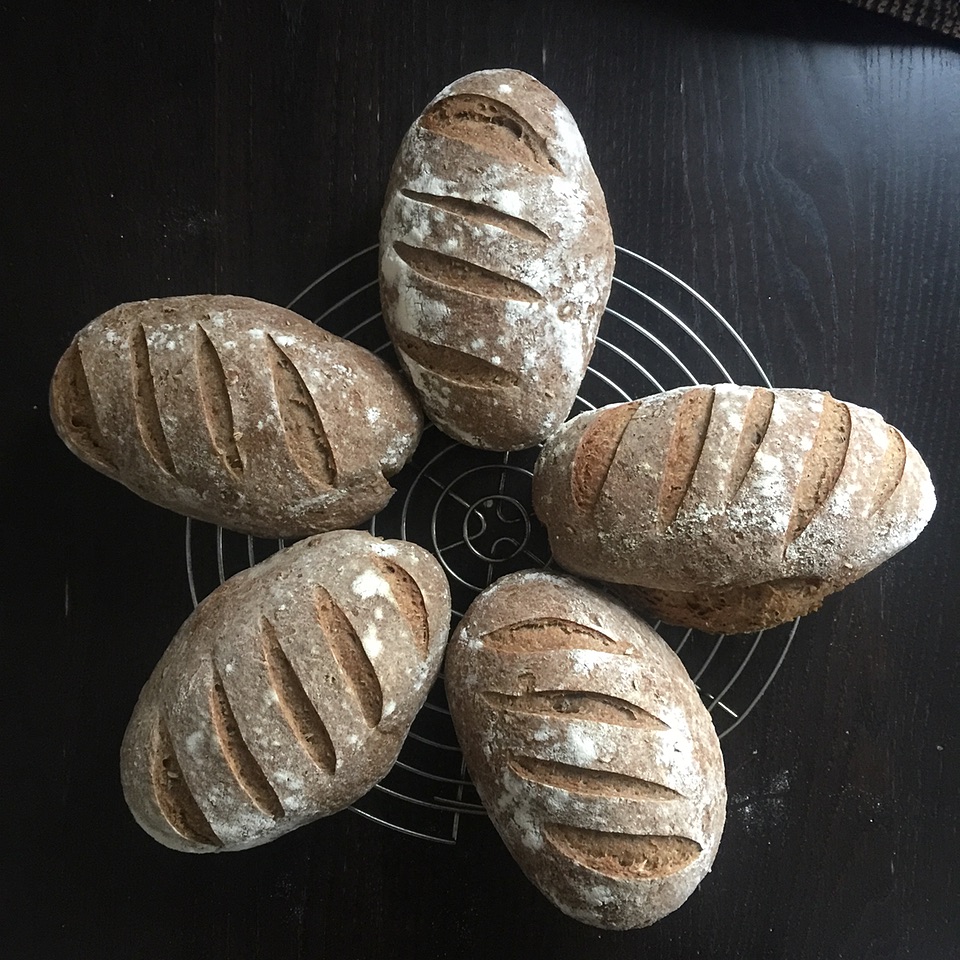
I bake two of my smaller loaves at a time, on a baking stone, and with boiling water in a pan at the bottom of the oven to provide steam for the first half of the bake. In the past, I’ve noticed that sometimes one of the loaves has a fine ear while the other doesn’t. I’ve assumed that this is some quirk of shaping, which I am still not that good at, because other than that the two loaves are treated more or less identically. Then yesterday, as I took these two loaves out of the oven, a thought occurred to me.

Two loaves, the one on the right with undeveloped ear
The one that didn’t get an ear, the score was facing the oven wall. The one that did, the score was facing the middle of the oven.

The oven is gas fired, but still, most of the heat, I understand, is radiating from the walls. So, could being closer to the hot wall set the score before oven bloom could lift up that flap?

Next batch, I made sure that both scores were facing the centre. A little tricky, that, as I score after I place the loaf on the peel, so I had to do one left-handed. And lo, both loaves developed a fine ear.

Two loaves both with good ears, the one on the right badly scored because left-handed

This is just a single observation, of course, to be repeated in weeks to come, which will help with the left-handed blade use. Still, I can’t help but think I’m onto something.

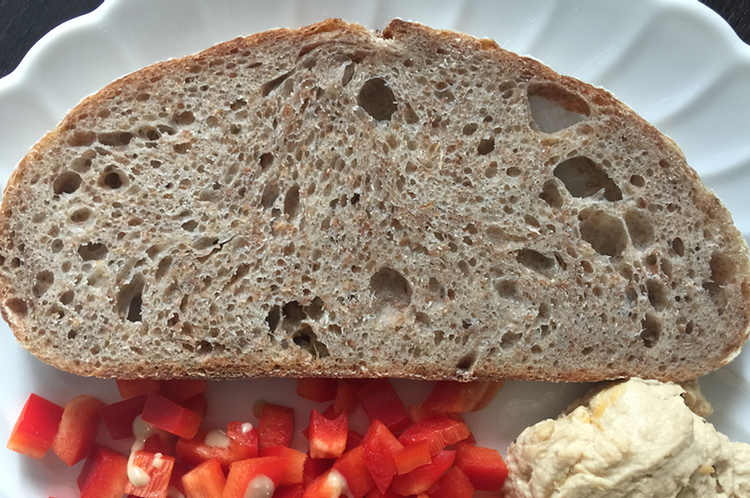
Searching around, I found one discussion that early steaming gives better ears. I’ve always believed that to be true, because steaming helps keep the skin pliable longer. For that reason, I have always pre-steamed the oven for a minute or two before putting in the loaves, and I also give the loaves a quick spray of water just before they go in. Seems to me, though, that with this kind of improvised steam system, the position of the loaf in the oven also makes a difference. But is that the only factor?

A couple of people with whom I have shared the recipe for black pepper rye have said that it is hard to turn the ingredients into a dough, despite the very clear tips in my write-up. So this week I thought, with 3.3kg of the dough to make, I would also make a video of how it comes together under my hands. I jury-rigged a support for the phone on the shelf about the counter, set the time-lapse video going and got to work. As I got stuck in, however, I forgot all about the camera, and of course my head kept getting in the way, so the resulting video is not quite as informative as I hoped it might be.

When I complained about this to a dear friend, customer for the bread and marketing expert, she pooh-pood my reluctance to expose my ineptitude and told me to share it anyway. “It makes you more human. You’ll get a load of followers.”

Well, I’m not really after a load more followers, but what the heck.

And the black pepper rye did turn out really well.

50 percent long soak 1

Jonathan Bethony, who runs Seylou Bakery in Washington DC, mills his own wheat and uses 100% of the grain. Talking to him for Eat This Podcast I learned about the difference in bran between softer European wheats and harder North American wheats. My wholemeal, from softer wheats, has larger flecks of bran that cut through the gluten network so the bread doesn’t rise as much. Having learned more of the details, I decided to give my brown flour a really long soak before making the dough.

This soaking period, without any leavening, is usually called an autolyse. Before, I’ve generally done a 30 minute autolyse, maybe an hour. Then lately I upped it to overnight, although that was for all the flour. For an experiment, I decided yesterday to soak only the wholemeal. I hoped that a long soak with more available water (not absorbed by the white flour) would soften the larger flecks of bran even more, so the dough structure would survive better. Also, hearing that Jonathan pushes hydration to 100 and even 110 percent, I thought that I could usefully push mine to 80% (from about 70% most of the time).

So, at the same time as I started the second build of the wholemeal leaven, I put the rest of the wholemeal to soak in all of the water, 300g of flour in 600g of water (200% hydration). A soupy mess. Eight hours later I added the leaven (350g at 75%), the strong white flour (500g) and the salt (17g). After mixing by hand to incorporate and distribute everything I did a set of folds at roughly 30, 60 and 120 minutes. After three hours of bulk fermentation I pre-shaped the loaves as gently as I could, gave them a bench rest of 30 minutes and then put the shaped loaves into the fridge for an overnight rise.

Slashed and baked from cold in a Dutch oven at 235°C for 26 minutes, before removing the lid and giving another 26 minutes at a slightly lower temperature.

50 percent long soak 2

The rise was great, with good oven spring. The texture was fabulous, with a crisp crust and a soft, light crumb. The structure was open, without any giant holes, and that’s the way I like it, uh huh.

Tasted pretty good too. I could be mistaken but I think the nuttiness of the grain is more pronounced and perhaps the long fermentation also brings out more of the natural sweetness. Next time I might even try pushing the hydration to 85%

A little more than a year ago I started experimenting with a long autolyse for my 50% wholemeal loaves. I’ve recently tried it again, and I am even more content with the result. This post isn’t so much a recipe as an outline of how to do it with any wholemeal loaf, probably even 100%.

It starts with the starter. A change I’ve adopted almost completely over the past few months has been to use two builds rather than one in getting my starter going. I think it started with the Hamelman Multigrain with Soaker. That calls for about 35% prefermented dough, which is a bit of a stretch for the 50gm or less of my starter that I routinely keep. So now, no matter what bread I’m making, I do two builds. For the wholemeal starter that means 100gm of flour and 75gm of water and then, 8-12 hours later, the same again.

At the same time as I feed the starter for the second time I prepare the rest of the dough. In my case, that involves:

300gm wholemeal flour
500gm white flour
600gm water ((That gives 75% hydration; I'm pretty convinced the technique could go to 80% easily.))
17gm salt

That sits on the countertop alongside the starter; no need to refrigerate.

When the starter is good and active, anywhere between 4 and 8 hours later, I remove a piece that goes into the fridge for next time and break the remainder into chunks that I bung on top of the wet dough. Then, with a wet hand, it is simply a matter of doing a few folds to get the starter incorporated into the dough.

Tip the dough out onto the counter and flatten it well with the heel of your hand to form a rough rectangle. This helps to distribute the starter too. Then fold in three, first in one direction, then the other. Put the ball back into the bowl cover with a damp towel and leave for an hour.

After an hour, do the wet-hand fold thing again and leave it for another hour. ((For a proper description of how to do that, go and take a look at Trevor Wilson’s video.))

Repeat the fold every hour, becoming more gentle as the dough bulks up and builds strength. How many hours you will have to leave it depends on the usual factors; temperature and strength of starter. Mine is usually done after about four hours. At that point, divide the dough in two (or three), shape as you prefer and allow to prove. Depending on timing, I sometimes have to retard the loaves in the fridge overnight. The one in the photo above was in the fridge overnight and baked from cold after just an hour on the counter while the over heated up.

Then bake — with steam to begin with — for about 10% longer you normally would bake a white loaf of the same size.

Allow to cool before slicing.