Twice a week, I wake my starters from their frigid slumbers and feed them up so they are ready to leaven my bread. Different people evolve different procedures that suit their way of working. Here’s mine.
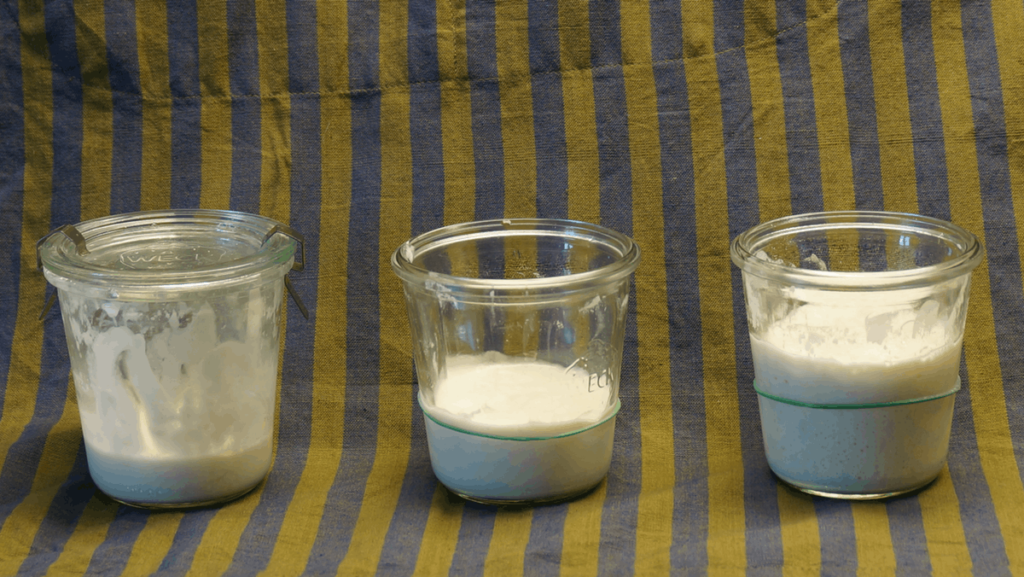
Starter workflow, left to right. Original, freshly fed, active.
In the fridge I keep about 80g of the white starter, which I made myself more than 30 years ago, and about 40g of the wholemeal “100-year-old Tuscan” starter that was shared with me a decade or so ago. Two days before the bake, i.e. on Monday for Wednesday, I remove the jar of white starter from the fridge (that’s it on the left) and put 20g of it into a clean jar. I add 40g of water and 40g of flour, stir it up, scrape down the sides and mark the level with a rubber band. That’s it in the middle.
The next morning, it is good and active. If you look closely at the jar on the right, you can see it has actually fallen back a little from the high tide mark, showing that it is past its peak. I will now feed that again, and possibly a third time, to get the amount of leaven I need for the amount of dough I need to make.
The starter goes back in the fridge. The jar normally contains enough to create a leaven for four bakes. When I’m down to my last few grams, I do a couple of feeds specifically to build the starter, which then lives in the fridge.
For the white starter, everything is very easy because it is at 100% hydration, which means I add equal amounts of flour and water each time I feed it.
The brown Tuscan starter is a little trickier, because it is at 75% hydration. I begin with the whole 40g and add flour and water in the ratio of 4:3, which usually means 100g of flour and 75g of water for the first feed and 300g of flour and 225g of water for the second. At that point, I remove about 40g and pop it back into the fridge.
This is just my tried and tested approach. We discuss others during the one-day course in Rome. The next one is on 5 April at Latteria Studio.
Mentions