Successful panis quadratus seen in elevation

Panis quadratus, an offering to Fornax.

My visit to Ostia Antica last year, guided by the wonderfully knowledgeable Farrell Monaco, was destined to end in more than a podcast. There was no way I was going to be able to avoid attempting a panis quadratus of my own, and what better time to make the effort than during Fornacalia?

This is the festival during which ancient Romans made offerings to the goddess Fornax. She was charged with ensuring that when they parched the wheat, which made it easier to mill, the grain did not burn. I did not go as far as making my own mola salsa, but I had to attempt the bread, using Farrell Monaco’s latest iteration for a particularly festive version with fennel and poppy seeds and fresh parsley.
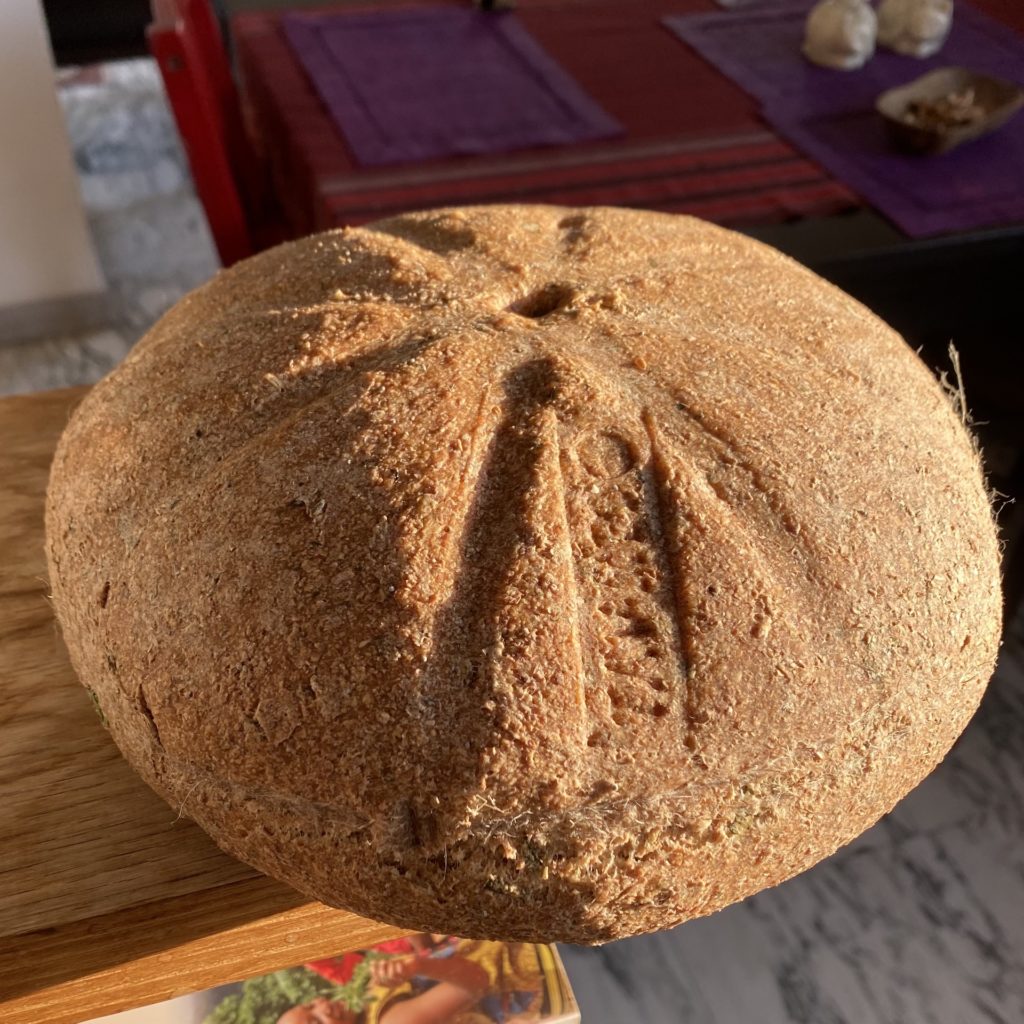
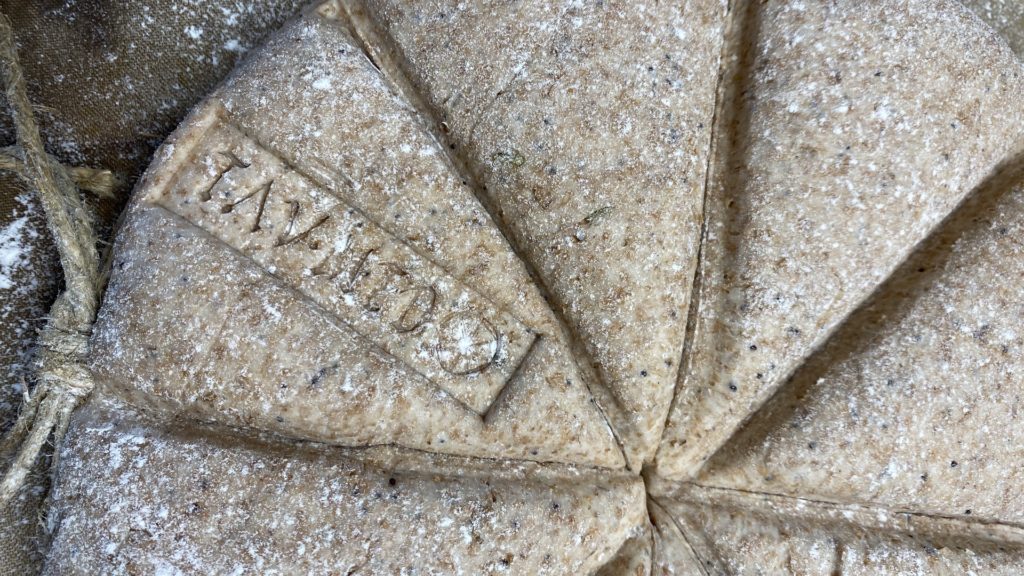
First effort at panis quadratus; the demarcations have almost vanished because they were not deep enough.

First attempt at panis quadratus. I was too timid with the demarcations, which almost vanished as a result

I’m not going to go into much detail, because thanks to her research and experiments Farrell’s articles tell you all you need to know and plenty more besides. The dough is actually very easy for a slightly experienced baker. It is quite stiff, about the same as my usual bagel dough, but being 100% wholemeal never quite becomes as smooth and elastic. Its stiffness, in fact, makes me really curious about the kneading machines that we saw in Ostia. Could wooden paddles really have had any impact on a 55% hydration dough of 100% wholemeal flour? I’d love to see a reconstruction in operation.

Anyway, the relatively small amount of leaven means it doesn’t rise very quickly, so on my first attempt I put it in the fridge overnight because I didn’t fancy staying up into the early hours even to please Fornax. The second time, I started much earlier in the day — about 8:00 am — and had a baked loaf by 5:00 pm.

Loaf before baking with string tied around the equator, much deeper demarcations and the impressed bread stamp

Second attempt ready for baking, with much deeper demarcations.

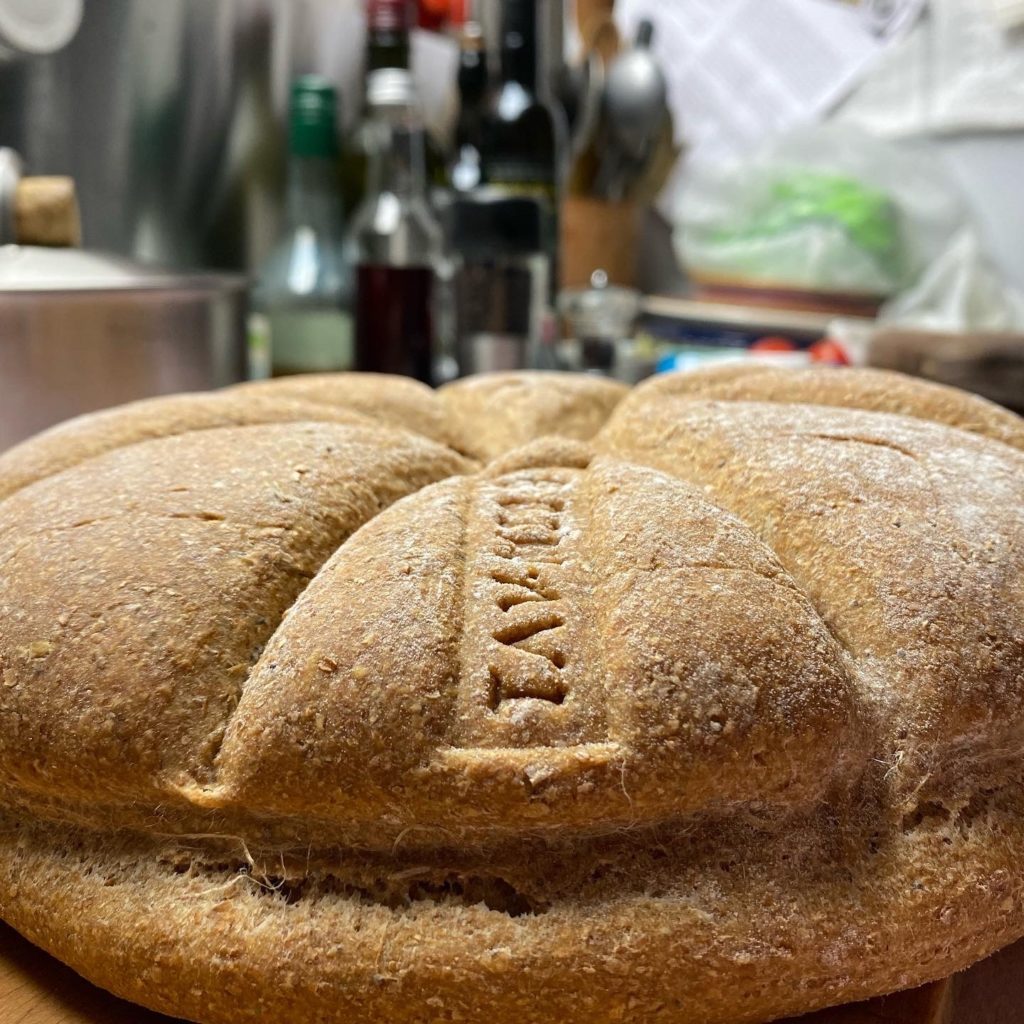
The tricky part is not the dough but the shaping and handling. The key elements of panis quadratus are the belt around its equator and the divisions pressed into the top to demarcate the sections. Tying the string, of finest Italian hemp, was a little bit fiddly for my fat fingers. And on the first trial, I was much too timid about pressing my reed (bamboo, actually) into the top of the dough. As a result, just as Farrell foretold during our visit to Ostia, the oven spring all but obliterated the marks. The next time I bore down on the bamboo and the marks survived well. And even though mine were the only loaves in my oven, for the finishing touch I did mark them with the bread stamp Farrell sent me.

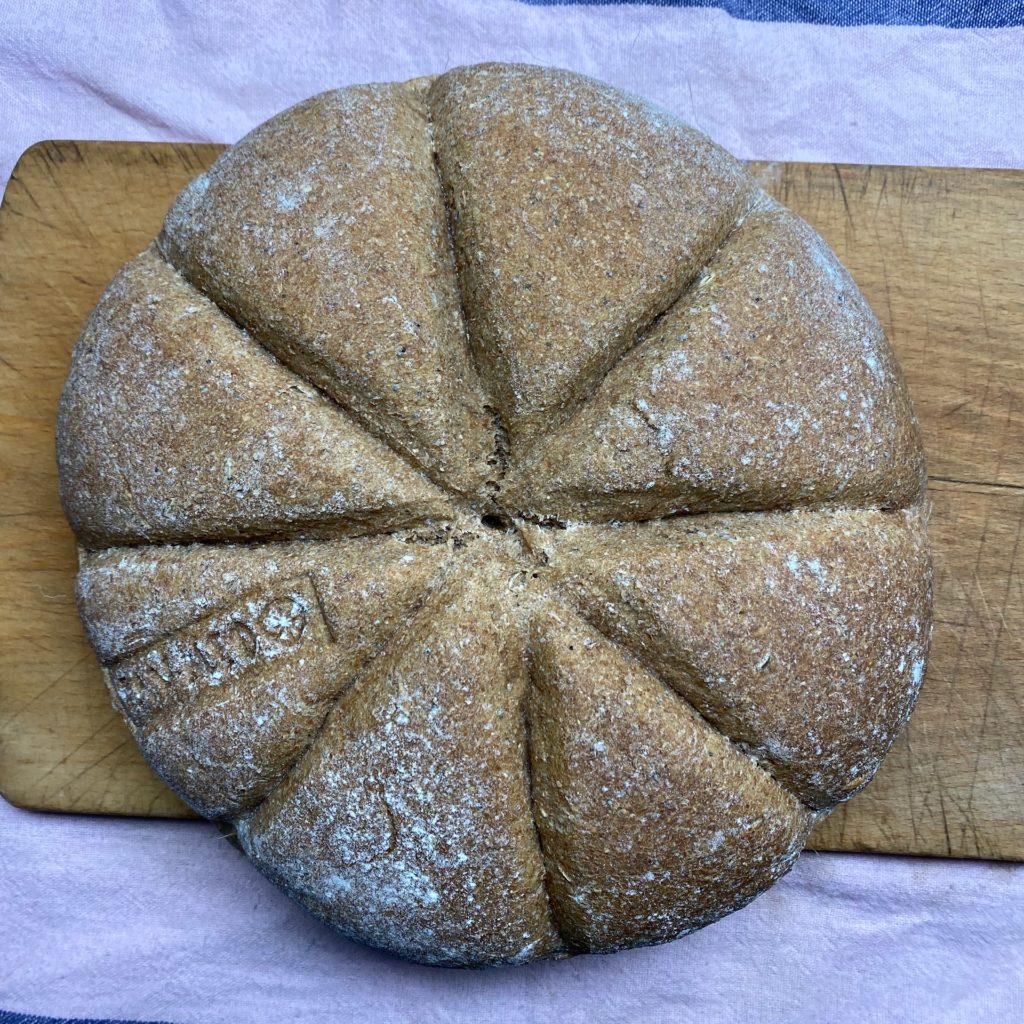
The finished panis quadratus, fresh out of the oven, its demarcations and stamp intact

Second attempt just out of the oven, with the demarcations clear and the bread stamp visible.

As for the taste, it really is rather good. The bread is by no means light and fluffy, but it is not hard to chew either. It is soft, without being fluffy, and the taste of the poppyseeds and especially the fennel, comes through in every bite. I really like it with some well-aged sheep’s milk cheese, although it is also very good with a little butter and honey.

Fornacalia ends tomorrow. I reckon I will be in Fornax’s good graces for another year.
50 percent long soak 1

Jonathan Bethony, who runs Seylou Bakery in Washington DC, mills his own wheat and uses 100% of the grain. Talking to him for Eat This Podcast I learned about the difference in bran between softer European wheats and harder North American wheats. My wholemeal, from softer wheats, has larger flecks of bran that cut through the gluten network so the bread doesn’t rise as much. Having learned more of the details, I decided to give my brown flour a really long soak before making the dough.

This soaking period, without any leavening, is usually called an autolyse. Before, I’ve generally done a 30 minute autolyse, maybe an hour. Then lately I upped it to overnight, although that was for all the flour. For an experiment, I decided yesterday to soak only the wholemeal. I hoped that a long soak with more available water (not absorbed by the white flour) would soften the larger flecks of bran even more, so the dough structure would survive better. Also, hearing that Jonathan pushes hydration to 100 and even 110 percent, I thought that I could usefully push mine to 80% (from about 70% most of the time).

So, at the same time as I started the second build of the wholemeal leaven, I put the rest of the wholemeal to soak in all of the water, 300g of flour in 600g of water (200% hydration). A soupy mess. Eight hours later I added the leaven (350g at 75%), the strong white flour (500g) and the salt (17g). After mixing by hand to incorporate and distribute everything I did a set of folds at roughly 30, 60 and 120 minutes. After three hours of bulk fermentation I pre-shaped the loaves as gently as I could, gave them a bench rest of 30 minutes and then put the shaped loaves into the fridge for an overnight rise.

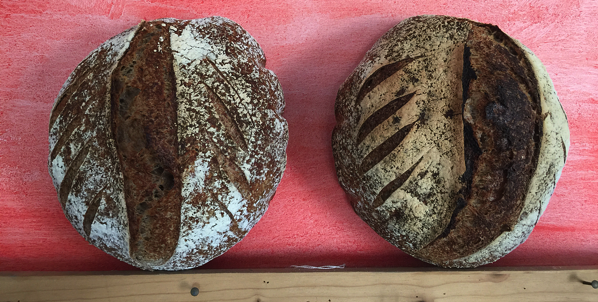
Slashed and baked from cold in a Dutch oven at 235°C for 26 minutes, before removing the lid and giving another 26 minutes at a slightly lower temperature.

50 percent long soak 2

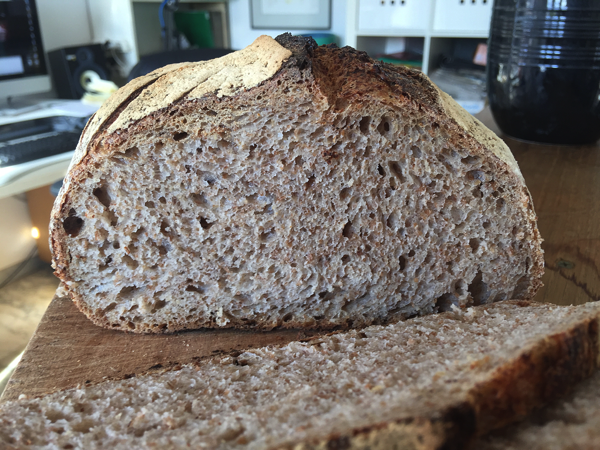
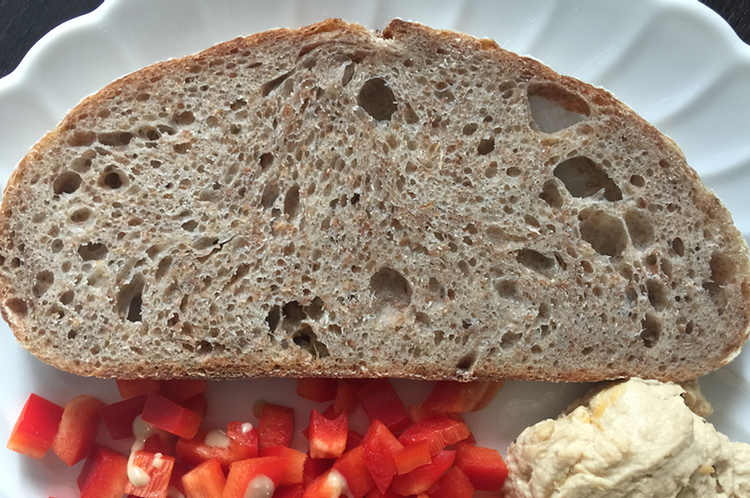
The rise was great, with good oven spring. The texture was fabulous, with a crisp crust and a soft, light crumb. The structure was open, without any giant holes, and that’s the way I like it, uh huh.

Tasted pretty good too. I could be mistaken but I think the nuttiness of the grain is more pronounced and perhaps the long fermentation also brings out more of the natural sweetness. Next time I might even try pushing the hydration to 85%

A little more than a year ago I started experimenting with a long autolyse for my 50% wholemeal loaves. I’ve recently tried it again, and I am even more content with the result. This post isn’t so much a recipe as an outline of how to do it with any wholemeal loaf, probably even 100%.

It starts with the starter. A change I’ve adopted almost completely over the past few months has been to use two builds rather than one in getting my starter going. I think it started with the Hamelman Multigrain with Soaker. That calls for about 35% prefermented dough, which is a bit of a stretch for the 50gm or less of my starter that I routinely keep. So now, no matter what bread I’m making, I do two builds. For the wholemeal starter that means 100gm of flour and 75gm of water and then, 8-12 hours later, the same again.

At the same time as I feed the starter for the second time I prepare the rest of the dough. In my case, that involves:

300gm wholemeal flour
500gm white flour
600gm water ((That gives 75% hydration; I'm pretty convinced the technique could go to 80% easily.))
17gm salt

That sits on the countertop alongside the starter; no need to refrigerate.

When the starter is good and active, anywhere between 4 and 8 hours later, I remove a piece that goes into the fridge for next time and break the remainder into chunks that I bung on top of the wet dough. Then, with a wet hand, it is simply a matter of doing a few folds to get the starter incorporated into the dough.

Tip the dough out onto the counter and flatten it well with the heel of your hand to form a rough rectangle. This helps to distribute the starter too. Then fold in three, first in one direction, then the other. Put the ball back into the bowl cover with a damp towel and leave for an hour.

After an hour, do the wet-hand fold thing again and leave it for another hour. ((For a proper description of how to do that, go and take a look at Trevor Wilson’s video.))

Repeat the fold every hour, becoming more gentle as the dough bulks up and builds strength. How many hours you will have to leave it depends on the usual factors; temperature and strength of starter. Mine is usually done after about four hours. At that point, divide the dough in two (or three), shape as you prefer and allow to prove. Depending on timing, I sometimes have to retard the loaves in the fridge overnight. The one in the photo above was in the fridge overnight and baked from cold after just an hour on the counter while the over heated up.

Then bake — with steam to begin with — for about 10% longer you normally would bake a white loaf of the same size.

Allow to cool before slicing.