Read it and weep (tears of joy). In Friendship Bake: Building Community, Bonnie Ohara of Alchemy Bread tells some of the story of her home-baking operation and how she has helped to create and nourish her local community.
This recipe from master rye baker Stanley Ginsberg sounds really delicious and makes me want to try it. Only problem is that I don’t have any rye malt, and I’m not inclined to make or buy some just for this. I wonder whether the malt powder I do have, which I think must be wheat, will do? Only one way to find out …
A little more than a year ago I started experimenting with a . I’ve recently tried it again, and I am even more content with the result. This post isn’t so much a recipe as an outline of how to do it with any wholemeal loaf, probably even 100%.
It starts with the starter. A change I’ve adopted almost completely over the past few months has been to use two builds rather than one in getting my starter going. I think it started with the Hamelman Multigrain with Soaker. That calls for about 35% prefermented dough, which is a bit of a stretch for the 50gm or less of my starter that I routinely keep. So now, no matter what bread I’m making, I do two builds. For the wholemeal starter that means 100gm of flour and 75gm of water and then, 8-12 hours later, the same again.
At the same time as I feed the starter for the second time I prepare the rest of the dough. In my case, that involves:
300gm wholemeal flour
500gm white flour
600gm water ((That gives 75% hydration; I'm pretty convinced the technique could go to 80% easily.))
17gm salt
That sits on the countertop alongside the starter; no need to refrigerate.
When the starter is good and active, anywhere between 4 and 8 hours later, I remove a piece that goes into the fridge for next time and break the remainder into chunks that I bung on top of the wet dough. Then, with a wet hand, it is simply a matter of doing a few folds to get the starter incorporated into the dough.
Tip the dough out onto the counter and flatten it well with the heel of your hand to form a rough rectangle. This helps to distribute the starter too. Then fold in three, first in one direction, then the other. Put the ball back into the bowl cover with a damp towel and leave for an hour.
After an hour, do the wet-hand fold thing again and leave it for another hour. ((For a proper description of how to do that, go and take a look at .))
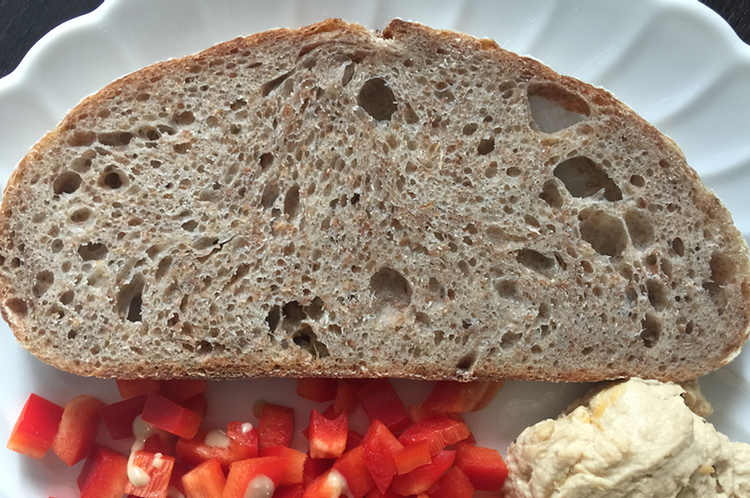
Repeat the fold every hour, becoming more gentle as the dough bulks up and builds strength. How many hours you will have to leave it depends on the usual factors; temperature and strength of starter. Mine is usually done after about four hours. At that point, divide the dough in two (or three), shape as you prefer and allow to prove. Depending on timing, I sometimes have to retard the loaves in the fridge overnight. The one in the photo above was in the fridge overnight and baked from cold after just an hour on the counter while the over heated up.
Then bake — with steam to begin with — for about 10% longer you normally would bake a white loaf of the same size.
Allow to cool before slicing.
The workshop on Saturday 16th December is fully booked with a waiting list, and there isn’t as much demand as I expected for the more advanced class on Sunday 17th.
As a result, I’m happy to change that to another beginner class, although I would also be happy to include some information about ciabatta and rye if there’s demand for that.
As before contact Jennifer Wilkin Penick about booking a place.
Which weighs more, a pound of feathers or a pound of lead?
As part of the Modernist Bread Crumbs podcast series, Heritage Radio Network has been offering a series of baking tips. Today’s is “How to sift flour“. It contains this priceless gem:
One thing to note, as well, is that sifted flour weighs significantly less than unsifted flour, so you may be putting in the wrong amount if you are not sifting carefully.
Daft, at least to me. And true only if you are attempting to weigh, say, a cup of flour. Why would you even bother to do that? Oh yes, because your forebears did it and all your recipes continue to do it and you don’t actually have a decent scale.
I suggest you ask Santa nicely.
You may still want to sift your flour for some recipes, but at least you won’t have to worry about how much it weighs.