I know I use the words sourdough, starter and leaven sloppily. I know which I mean when, but that doesn’t help people who are just beginning. So, I thought I would clarify with an example.

This week’s big bake will amount to 3 kg of dough, and my formula calls for 33% of that to be pre-fermented leaven. So, I need to build about 950 gm of leaven. For this particular bread, I always use the white flour starter that I keep at 100% hydration. I know that I’ve got about 100 gm of starter in the fridge, because I refreshed it just last week.

first build of sourdough leaven resting on notebook

Here’s the freshly mixed first build, resting on my notebook.

So, I remove 75 gm of the starter and mix it with 150 gm of flour and 150 gm of water. 1:2:2 in ratio terms. That keeps the hydration at 100% and does not give the starter too much to chew on as it becomes the first build of leaven.

At the same time, I now have only 25 gm of starter left. I could leave it at that and stick it back in the fridge, but I refresh that too. That means adding 50 gm of flour and 50 gm of water, exactly the same ratios as the first build.

Starter with fresh flour on a digital scale

The starter, refreshed with 50gm of water and 50 gm of flour.

Both of them will stay out now for about 12 hours; it is getting cold here. Then this evening, the starter will go back in the fridge. The first build, which currently weighs 375gm, will get 290 gm of flour and 290 gm of water, takings the amount of the second build up to 955 gm, which gives me a slight excess to work with.

starter and leaven set aside for the bacteria and yeasts to multiply

The refreshed starter and the first build of the leaven will now rest for about 12 hours.

Tomorrow, I’ll use all the leaven to raise the sourdough, which won’t be at all sour.

Lately I’ve started baking in greater bulk to satisfy my slowly growing list of people who pay me the ultimate compliment of paying for my bread. That could make sharing recipes here a little bit tricky, because not everyone wants to handle four loaves worth of dough at a time. ((I would love to get up to 12 loaves a time, but not with my current oven!)) Anyway, thanks to the miracle of baker’s math, I can give the quantities for a single loaf just as easily, so here goes.

Pre-ferment

I use my 100% hydrated leaven to start the pre-ferment, and as I store it in the fridge between bakes, that requires two builds to get it good and active, starting the morning before I want to start baking. To about 10g of starter I add 25g of flour and 25g of water, leaving that for about 12 hours to double. I then feed again with 25 g of flour and 25g of water, leaving it overnight. Next morning, I take 10 gm into a clean container and feed again with 25g flour and 25g water. This stays out on the counter for about 6 hours then goes into the fridge for storage.

The active starter goes into the pre-ferment.

  • 50g active starter at 100% hydration
  • 150g water
  • 250g strong white flour
  • 4g salt

First mix the water and the starter to break up the starter a bit, then add the flour and salt and stir well to incorporate everything into a rough dough. Put that aside to ripen. My kitchen is still pretty cold, so after a day the pre-ferment had barely moved and I had to put it into the fridge overnight. Next morning it had almost exploded out of its box. In warmer conditions, the pre-ferment will double in about 8-12 hours, but it really doesn’t matter much if you refrigerate to suit your schedule.

Final Dough

  • 50g whole rye flour
  • 50g wholewheat flour
  • 50g einkorn flour
  • 350g strong white flour
  • 185g water
  • 4g salt
  • 1/2 tsp dry yeast or 15g fresh yeast (optional)
  • All of the pre-ferment

The einkorn was my idea. If you don’t have any, add 50g of some other flour or just use 400g of strong white flour, rather than 350g. The yeast is completely optional, useful if you are in a hurry (or your kitchen is cold).

Mix the flours, salt and water and yeast if you’re using it. Knead the dough so that it has started to come together and then add a chunk of pre-ferment at a time, kneading between each chunk to start incorporating it into the dough. I guess about 4 or 5 chunks is right. It takes a bit of kneading to get everything properly mixed in but recently I have found this easier than mixing the pre-ferment with the water first. When the dough is uniform throughout, return it to the bowl, cover with a cloth and leave to bulk ferment.

After one hour, do one set of stretch and folds right there in the bowl. Wet your hand first and slip it gently under the dough, grab and pull up slowly, you don’t want to tear the dough, then fold it back onto the top of the dough and work your way around the ball of dough.

One (moving) picture being worth a thousand words, here’s my video.

Leave to bulk ferment for another hour, then do a second set of stretch and folds.

After a final hour of bulk fermentation, gently move the dough out onto the counter, shape, and prove for about 90 minutes before baking in a hot oven for about 50 minutes, with steam for the first half of the bake.

Earlier this week something about Stanley Ginsberg’s version of a rye from the Lithuanian resort of Palanga seemed to call to me. Maybe it was his summary description:

This is an exceedingly versatile bread that will go with pretty much anything savory: my own preference is for what I call “Baltic sushi” – a slab of lightly buttered rye, topped with herring and sliced red onion.

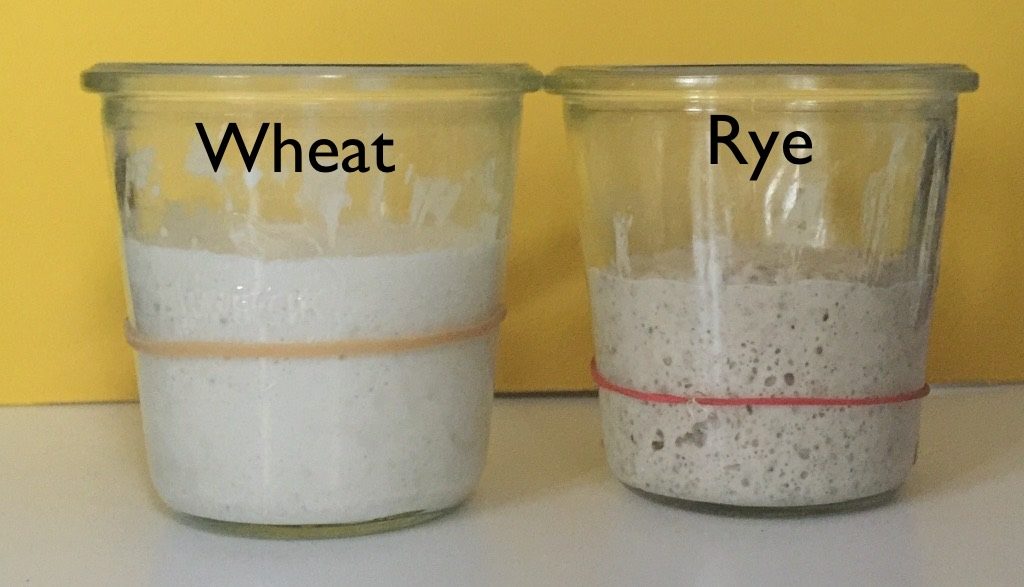
Or maybe it was because although the process looked complicated, I could see that it would result in a relatively easy-to-handle dough, which would make a nice change. Either way, it seemed worth a shot. My only misgiving was that my rye flour is wholemeal, rather than the light rye that the official recipe wants. ((The flour is Italian and stone-ground, from Viva, and I love it. It has a Falling Number of 220 sec, according to the website, which is pretty good.))

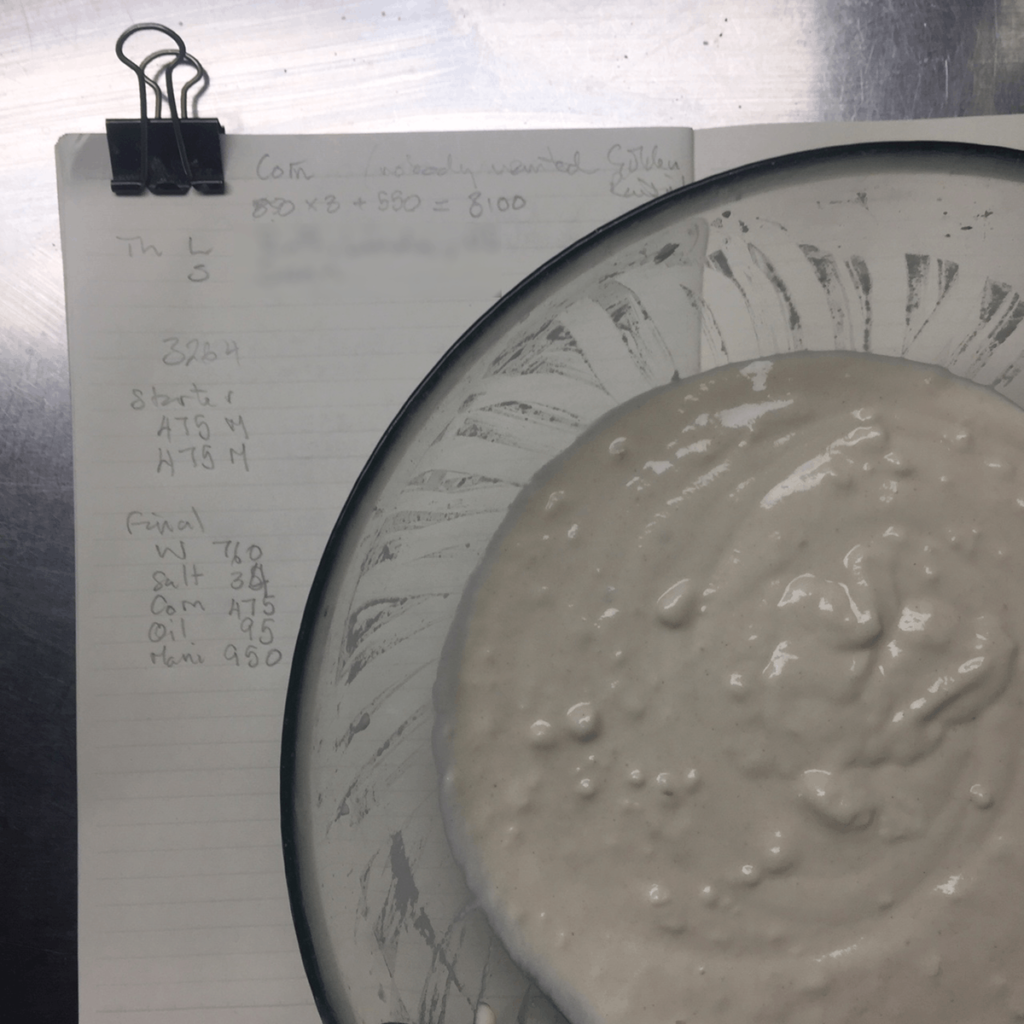
Anyway, I decided to give it a go, ((As usual, when I am strictly following someone else’s recipe I don’t give details here. Better you go to the original and grant the author the traffic.)) starting on Wednesday night, feeding my 100% hydration wheat leaven with rye to create the rye sour that the recipe needs to begin. ((Not sure how sour it is. Not very. I think it’s just a matter of terminology.)) The main lesson here was a vivid demonstration of how much livelier a rye leaven is than a wheat leaven. The rye roughly tripled, while the wheat barely doubled.

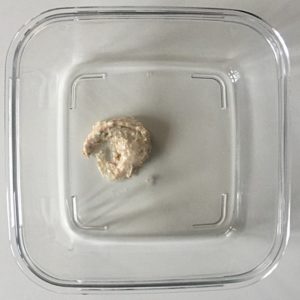
As a result, I was ready to begin the recipe proper, on Thursday morning, with the natural rye sponge. Five grams of starter seems far too little, but it did its job, and of course one of the fine side-effects of too much starter is a pancake for lunch.

In the afternoon of the first day, you make the scald. Mixing rye flour with hot, even boiling, water, is a standard technique for releasing some of the sugars. (See Black Pepper Rye.) In Ginsberg’s recipe, the water is at 65°C rather than boiling, and one is supposed to keep the scald at that temperature for three hours. I quickly discovered that even on the lowest setting, my oven was hotter than that, but making use of the thermal capacity of the baking stone and checking every half hour or so I was able to be a human thermostat and keep things at around that level. One more misgiving; only 2 gm of caraway seeds?

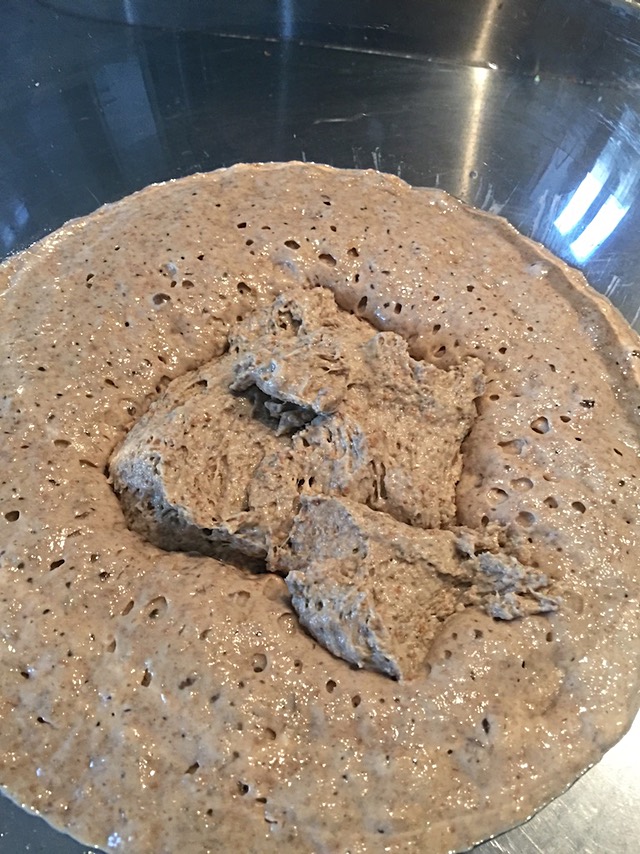
As forecast, the scald became quite liquid during that time, and developed a delicious, somewhat sweet, somewhat earthy aroma. After cooling the scald for an hour, I dumped the now well-risen sour onto it and mixed with my strongest spoon. Ginsberg says this is called an opara. Next morning, having been covered and left overnight, it had bulked up quite a bit and now smelled beery (malty?) rather than earthy.

Early on Friday, while the morning cuppa was brewing, I threw together the final component, a yeasted rye sponge, so that it would be ready at about the same time as the opara.

Came the moment to mix the final dough, which now gained 100 gm of bread flour, a fraction over 10% of the total flour. It all came together beautifully and despite being tacky in the way that rye doughs always are was not difficult to knead. In the end I stirred for about three minutes to get the wheat flour in, another three to get the rye in and a final three minutes kneading the whole.

In a clean bowl, it had risen to double within an hour. I pre-heated the oven and shaped a boule, leaving it to rise again on the peel. After a bit more than an hour, I judged it had expanded enough to go into the oven, and discovered that my water sprayer was clogged. Rome water is so hard. I quickly flicked water over the suface as best as I could and slid the loaf onto the stone.

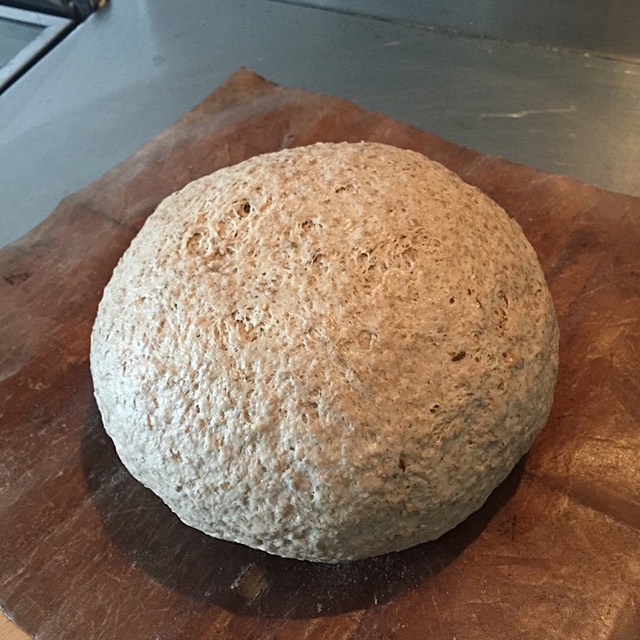
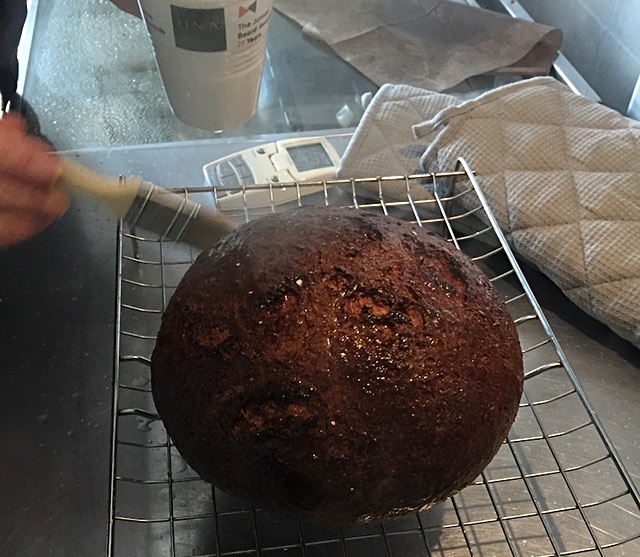
When I opened the oven door half an hour later the most wonderful deep rye aroma filled the kitchen, all sense of beeriness gone, just that nutty, slightly bitter, very grainy smell. Half an hour after that, I pulled out the loaf and brushed the surface with boiling water. This is new to me, though like the scald common with proper rye loaves, and it was fun to see clouds of steam arising from the loaf, which turned a darker, shinier brown. Not quite a horse chestnut, but getting there.

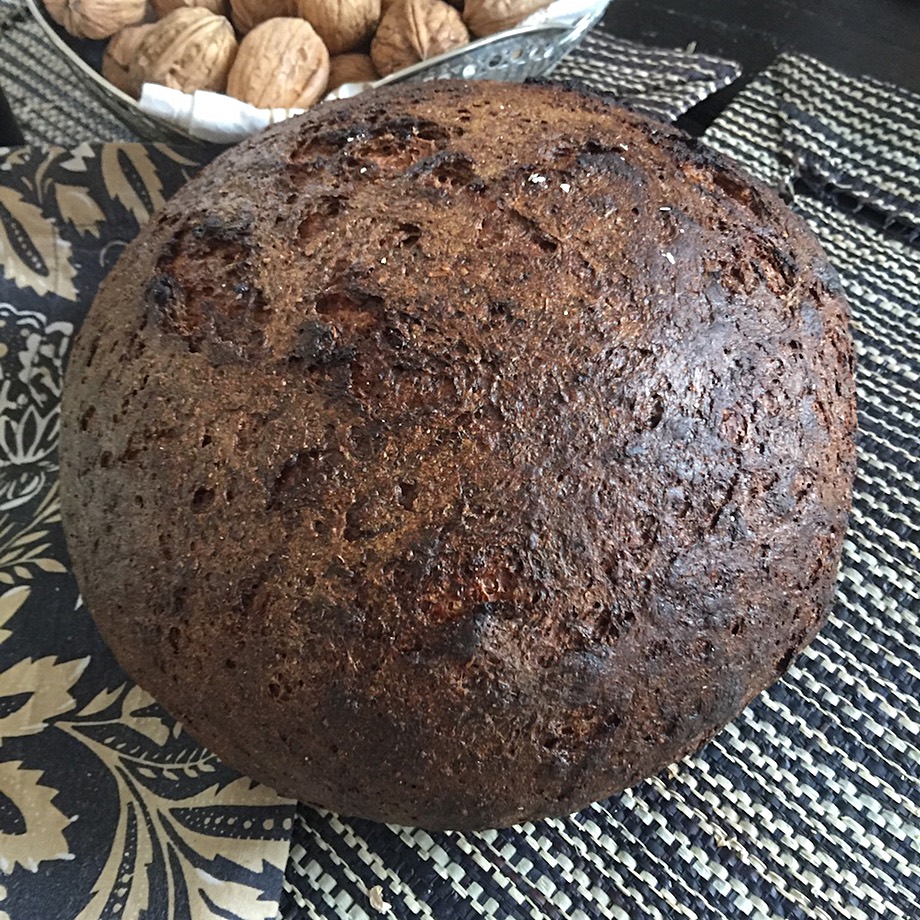
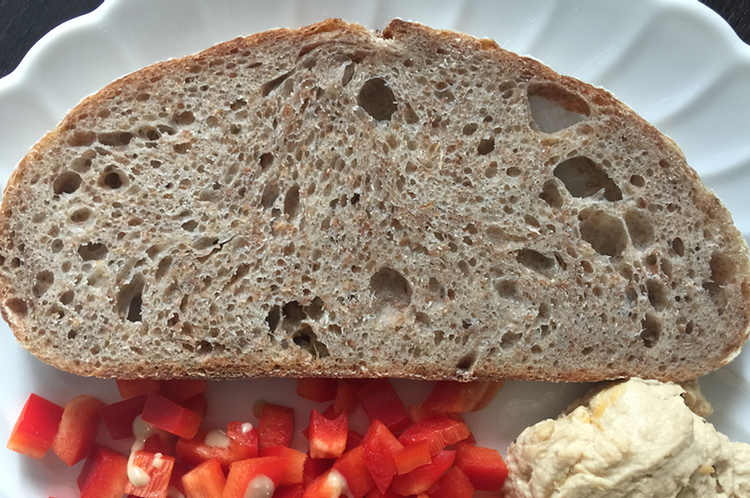
Palanga rye bread, the morning after baking.

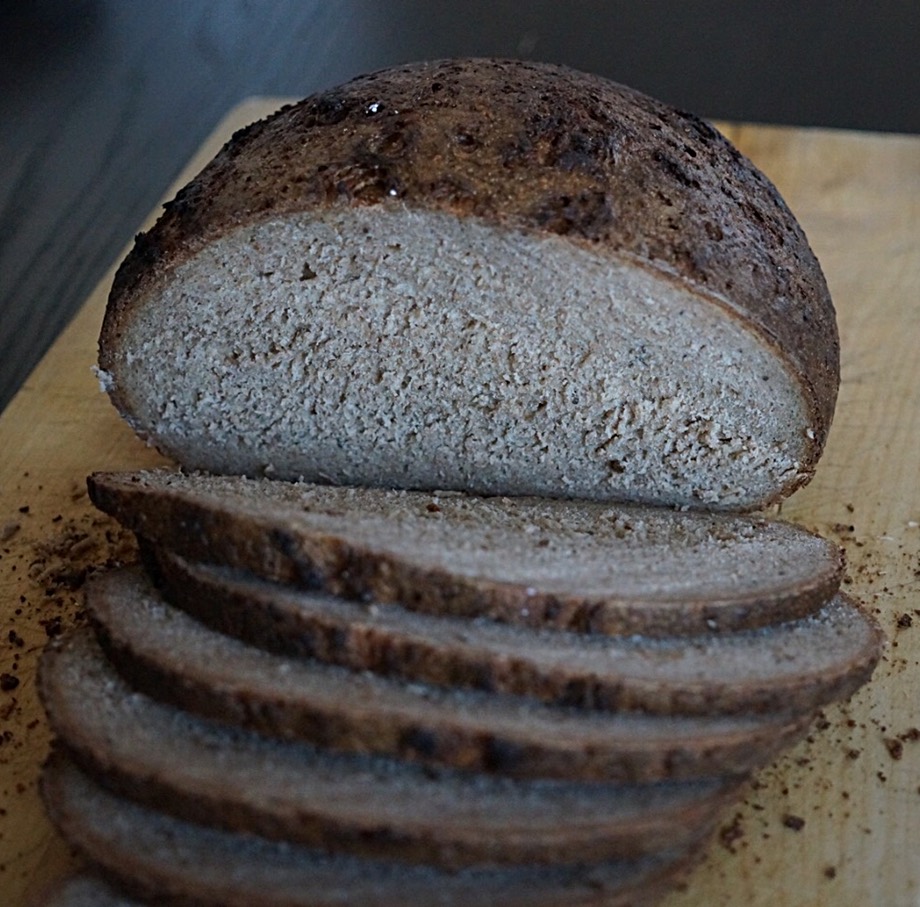
Fine-looking slices, ready for their filling.

Next morning we had a trip planned to the thermal baths, and a sandwich lunch was definitely in order. The loaf sliced quite easily and the crumb was even, soft and moist. All we did for the sandwiches was pile on some mortadella, and the general consensus was that this was most definitely a bread to reckon with. It is chewy, but not tough, and even the tiny amount of caraway comes through, suffusing the taste. The sweetness makes itself apparent later and is a good contrast as it mingles with the earlier flavours of the rye. A definite keeper, this.

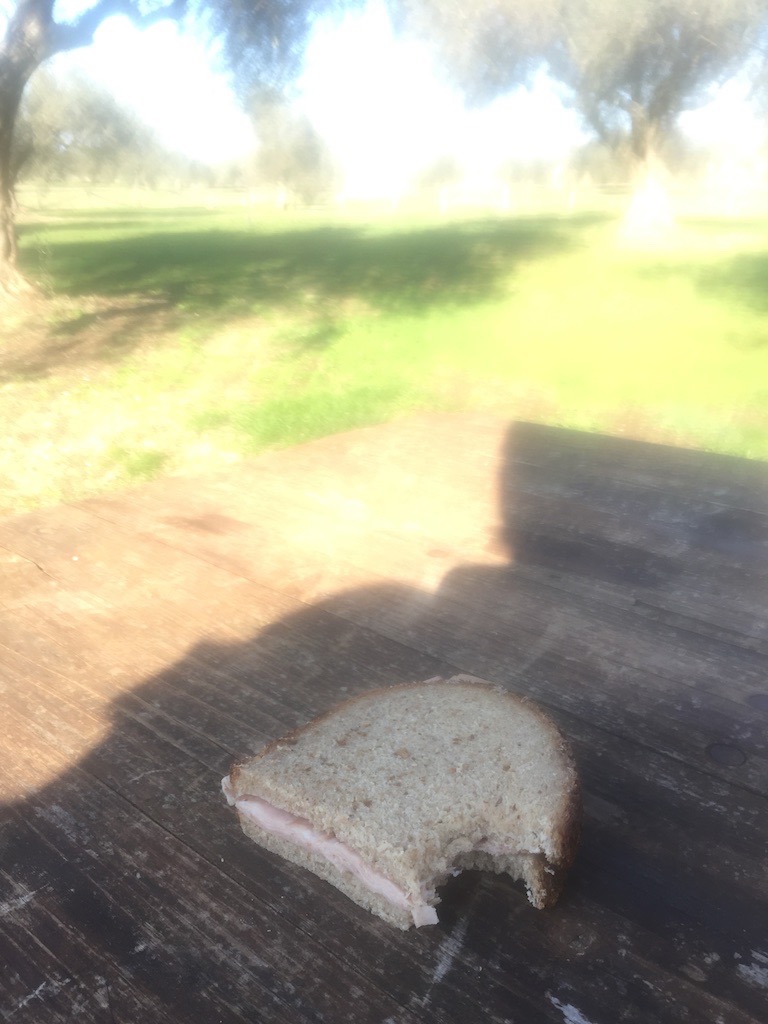
I thank the steam from the baths for the dreamy look, which perfectly suited the occasion.

A little more than a year ago I started experimenting with a long autolyse for my 50% wholemeal loaves. I’ve recently tried it again, and I am even more content with the result. This post isn’t so much a recipe as an outline of how to do it with any wholemeal loaf, probably even 100%.

It starts with the starter. A change I’ve adopted almost completely over the past few months has been to use two builds rather than one in getting my starter going. I think it started with the Hamelman Multigrain with Soaker. That calls for about 35% prefermented dough, which is a bit of a stretch for the 50gm or less of my starter that I routinely keep. So now, no matter what bread I’m making, I do two builds. For the wholemeal starter that means 100gm of flour and 75gm of water and then, 8-12 hours later, the same again.

At the same time as I feed the starter for the second time I prepare the rest of the dough. In my case, that involves:

300gm wholemeal flour
500gm white flour
600gm water ((That gives 75% hydration; I'm pretty convinced the technique could go to 80% easily.))
17gm salt

That sits on the countertop alongside the starter; no need to refrigerate.

When the starter is good and active, anywhere between 4 and 8 hours later, I remove a piece that goes into the fridge for next time and break the remainder into chunks that I bung on top of the wet dough. Then, with a wet hand, it is simply a matter of doing a few folds to get the starter incorporated into the dough.

Tip the dough out onto the counter and flatten it well with the heel of your hand to form a rough rectangle. This helps to distribute the starter too. Then fold in three, first in one direction, then the other. Put the ball back into the bowl cover with a damp towel and leave for an hour.

After an hour, do the wet-hand fold thing again and leave it for another hour. ((For a proper description of how to do that, go and take a look at Trevor Wilson’s video.))

Repeat the fold every hour, becoming more gentle as the dough bulks up and builds strength. How many hours you will have to leave it depends on the usual factors; temperature and strength of starter. Mine is usually done after about four hours. At that point, divide the dough in two (or three), shape as you prefer and allow to prove. Depending on timing, I sometimes have to retard the loaves in the fridge overnight. The one in the photo above was in the fridge overnight and baked from cold after just an hour on the counter while the over heated up.

Then bake — with steam to begin with — for about 10% longer you normally would bake a white loaf of the same size.

Allow to cool before slicing.